H.6 State Diagram
Junction & Auto Priority
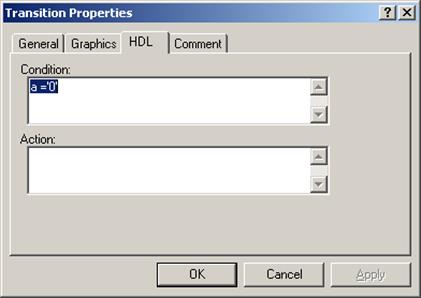
• Set condition for each transition
• Set condition for each transition
H.7
State Diagram
Junction & Auto Priority
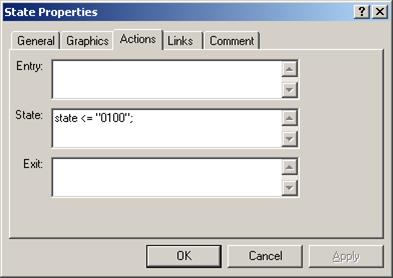
• Set “State Action” for each state
H.8
State Diagram
Junction & Auto Priority
• In “Preferences” window for State Diagram Editor, choose
“Transition Auto Priority”

H.10 State Diagram
Junction & Auto Priority
• Generated source code depends on transition priority
• You can change priority manually as well
 |
|||||||
 |
|||||||
 |
|||||||
 |
|||||||
Appendix I
VHPI Interface
I.1 VHPI Interface
• Open vhpitutorial design
• The design should contain following files:
– vhpi_component.vhd - contains ‘foreign‘ attribute with called VHPI function
– top.vhd - top level entity with instantiation of entity from vhpi_component.vhd file
– run_tutorial.do - macro to execute design
– vhpitutorial.cpp - C source code with sample vhpi tasks, called during simulation
– vhpitutorial.h - header file for C source
• The project calls two groups of VHPI functions:
– on elaboration
– during simulation execution
I.2
VHPI Interface
VHPI task registration in VHDL code
• In VHDL code (vhpi_component.vhd), you have to set FOREIGN attribute for architecture:
• In C code, you have set library name (“vhpi_tutorial”) and VHPI task name (call_vhpi_tutorial)
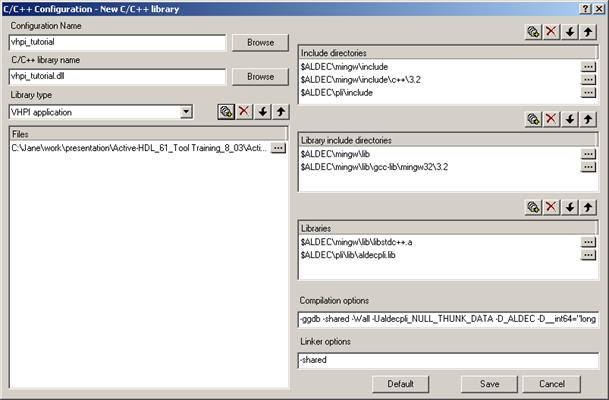
I.3 Compiling your VHPI application
• The MinGW environment including GCC compiler and GDB debugger is installed with Active-HDL to allow users to compile and debug their PLI/VHPI applications
• In the File menu, choose New | C/C++ Configuration
• Configuration name type in vhpi_tutorial
• Leave the default .DLL file name (same as configuration name)
• In library combo box select VHPI application
• Click Add button and point to the vhpitutorial.cpp
• When you finish the settings should look like shown in the picture
• Accept your settings by clicking Save button
I.4 Compiling your VHPI application
• A new file will appear in Design Browser called vhpi_tutorial.dlm
• Invoke context menu for this file and choose Build
• The file should compile successfully. If an error occurs, it will be reported in Console window and if you click on the message, you will be taken directly to the place with the erroneous code
I.5 VHPI Interface
• Execute macro run_tutorial.do

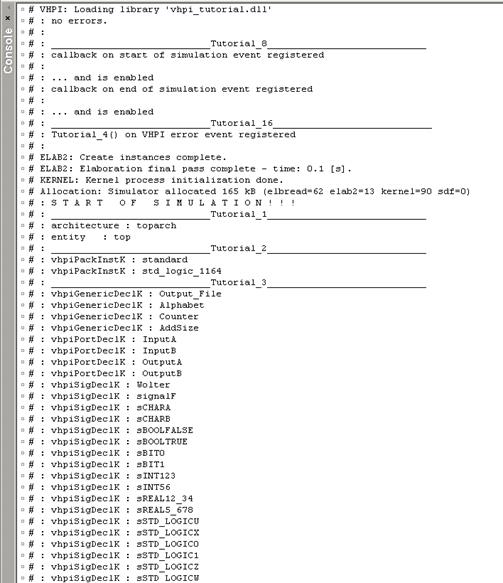
• You can see in the console reports from VHPI functions called during elaboration & execution of the design
I.6
VHPI Interface
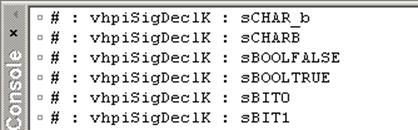
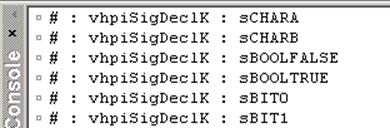
VHPI function listing signals
• Change the name and value of signal sCHARA in top.vhd file and save changes

• Run macro run_tutorial.do again and watch results on the console
before after
 |
|||
 |
|||
I.7 VHPI Interface
• After running run_tutorial.do macro simulation is in progress and you can see messages from callbacks, registered on signal value change events.
• See the console.
• After running run_tutorial.do macro simulation is in progress and you can see messages from callbacks, registered on signal value change events.
• See the console.
|
Уважаемый посетитель!
Чтобы распечатать файл, скачайте его (в формате Word).
Ссылка на скачивание - внизу страницы.