You can also call Stimulators by choosing the Stimulators option from the pop-up menu.
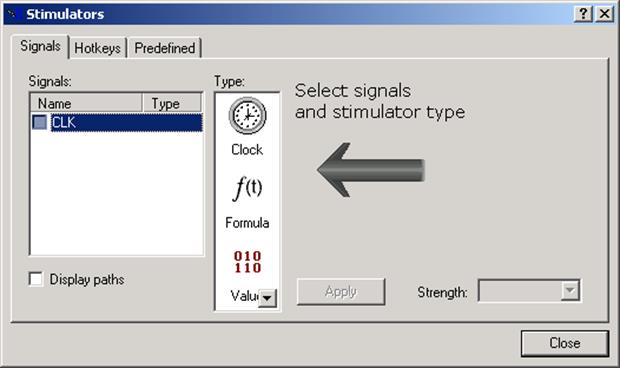
5.13 Assigning Stimulators
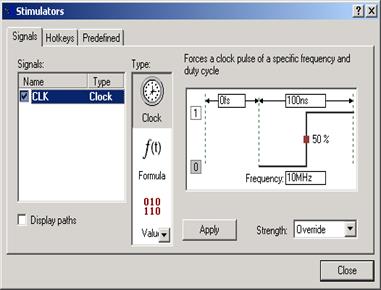
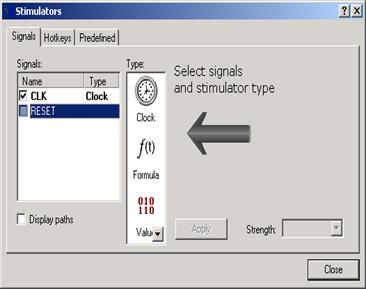
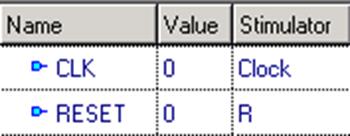
Choose the Clock type stimulator and click the Apply button to accept the default settings. To assign the next stimulator, you do not need to close the Stimulators window. Move it aside and select the RESET signal in the Waveform Editor. Notice the RESET signal appeared in the Stimulators window.
5.14 Assigning Stimulators
Use the ![]()
![]() icons to scroll the
stimulators types in the window. Select the Hotkey stimulator type.
Click inside the Press new hotkey field and press the R keyboard
key. Accept the stimulator by clicking the Apply button.
icons to scroll the
stimulators types in the window. Select the Hotkey stimulator type.
Click inside the Press new hotkey field and press the R keyboard
key. Accept the stimulator by clicking the Apply button.
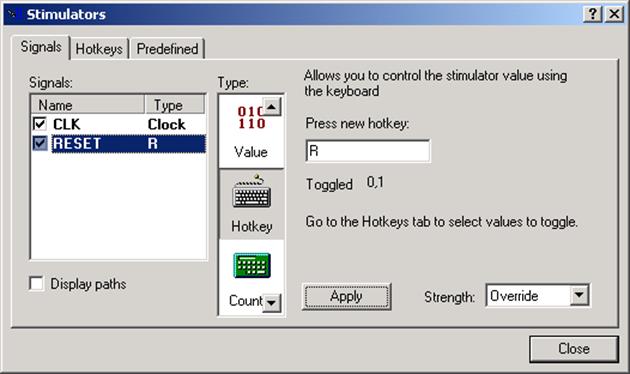
*Notice the tool displays the stimulator type in the Stimulator column
5.15 Advancing Simulation
When the signals
have stimulators assigned, you can run the simulation. Active-HDL lets you
advance simulation by clicking the two Run ![]() buttons.
buttons.
![]() The Simulation |Run For command advances
simulation by a specified
The Simulation |Run For command advances
simulation by a specified
time step. To set the time step, use the Simulation Step box located on
the
main toolbar:![]()
![]() The Simulation |Run Until command
The Simulation |Run Until command 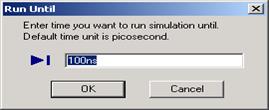
advances simulation until a specified time point.
Additionally, the Simulation |Run command allows you to run the simulation for an unspecified amount of time. The simulation ends when either of these conditions is met:
• There are no more test vectors.
• A breakpoint in the code has been set.
In each of the
above cases, you can break the ![]()
simulation by using the Stop command or by clicking
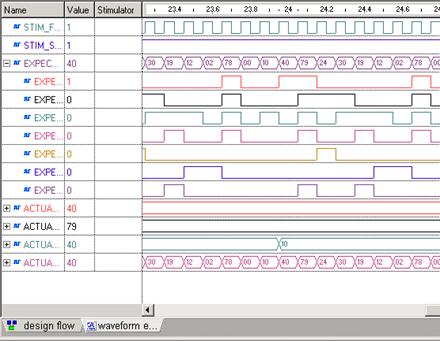
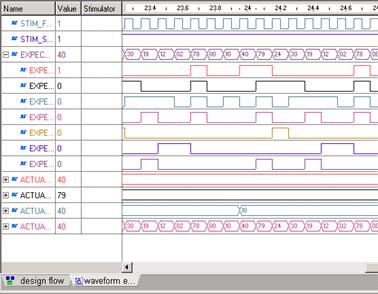
5.16 Advancing Simulation
• Set the Simulation Step to 50 ns in the box.
• Click the Run for![]() button or press the F5 keyboard key to
button or press the F5 keyboard key to
advance the simulation.
• Now, press the R keyboard key.
• Click the Run until![]() button and set
button and set 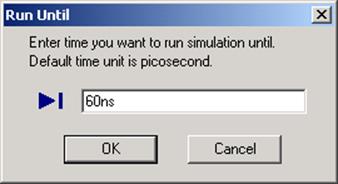
the time to 60 ns.
• Press the R key again.
• Set the Simulation Step to 100 ns in the box.
• Click the Run for ![]() button several times and observe the
button several times and observe the
simulation results.
• Click the Zoom to Fit ![]() button.
button.
• Click the + sign next to Q bus and expand the signal.
5.17 Customizing the View
The Waveform Editor allows scrolling the display with simulation results. To zoom the display that best suits the view, you can use toolbar buttons or the corresponding options from the View menu:
![]() - To increase the zooming factor twice or choose
Zoom|In.
- To increase the zooming factor twice or choose
Zoom|In.
![]() - To decrease the zooming factor twice or
choose Zoom|Out.
- To decrease the zooming factor twice or
choose Zoom|Out.
![]() - To adjust the zooming factor so as to display
the whole timing,
- To adjust the zooming factor so as to display
the whole timing,
or choose Zoom|Zoom To Fit.
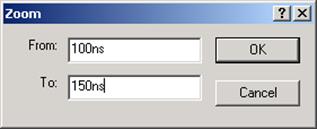
![]() - To specify exactly the zooming range. Type the
time points in the
- To specify exactly the zooming range. Type the
time points in the
Zoom window.
 You can also switch to Zoom mode
by clicking the Zoom mode button. In the zoom mode, you can select
manually the zoom scope and increase it. To decrease the zoom, select the scope
and then press and hold down the Ctrl key.
You can also switch to Zoom mode
by clicking the Zoom mode button. In the zoom mode, you can select
manually the zoom scope and increase it. To decrease the zoom, select the scope
and then press and hold down the Ctrl key.
5.18 Customizing the View
• Choose the Colorize Waveforms
option from the
Waveform menu.
Waveform Editor offers many useful functions for browsing and searching the results.
• 
• Go to a specified time point
• Set and browse simulation bookmarks
• Right click on the signal and choose Insert Empty Row.
5.19 Customizing the View
• The Waveform Viewer/Editor allows you to navigate backward and forward through events.
If there are no
signals selected in
the waveform window, an event
search goes through all signals.
After selecting one or more signals in the waveform, the timing cursor jumps to the nearest event found among displayed in the waveform window signals.
5.20 Customizing the View
To jump to the next/previous event:
• Switch to the Select mode .
• Click the waveform in place where you want to start tracking events. By default, tracking starts at the the beginning of the waveform (0ps).
• Click the Previous event button ![]() or the
or the
Уважаемый посетитель!
Чтобы распечатать файл, скачайте его (в формате Word).
Ссылка на скачивание - внизу страницы.