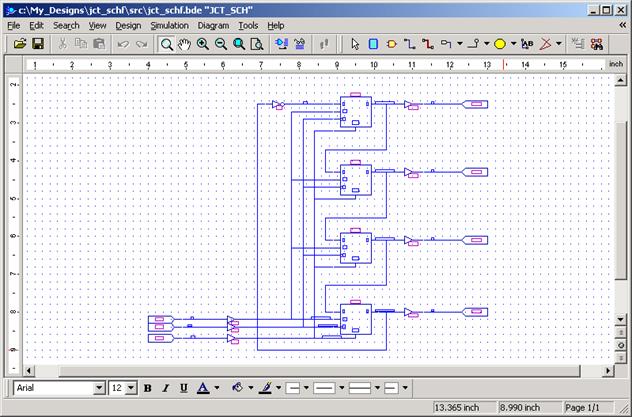
There is one BDE file in your Active-HDL design, but it includes primitives from SPARTANX library, meaning that this design cannot be implemented to any other devices.
C.6 Importing Foundation Designs
Now you will learn how to manually convert this diagram to HDL format. It means that HDL code created from this diagram will be fully synthesizable to any device.
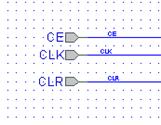
First, you have to replace all IPADs and OPADs with ports.
• Delete all IPADs and place Input Terminals
in their places
to port name automatically should be assigned net name
• Delete all OPADs and place output Terminals
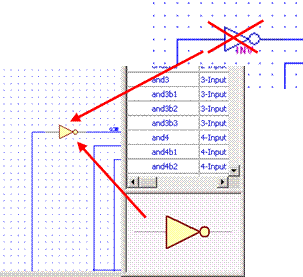
Simple gates can
be replaced by built-in symbols.
There is one inverter.
• Remove INV symbol
• Put in this place inv from built-in symbols
 |
|||
 |
|||
C.7 Importing Foundation Designs
Now you have to replace other symbols from the Xilinx library.
There are four D flip-flops (FDCE), four obufs and three ibufs.
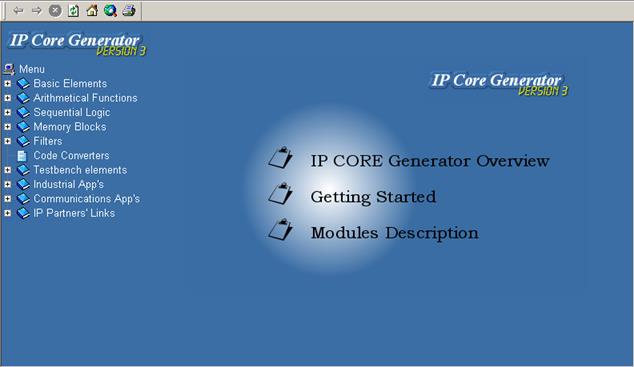
There aren’t any flip-flops and buffers in built-in symbols, but don’t worry - you don’t have to write code yourself - you can use IP CORE Generator !!!
• Run the IP CORE Generator from the Tools menu
C.8 Importing Foundation Designs
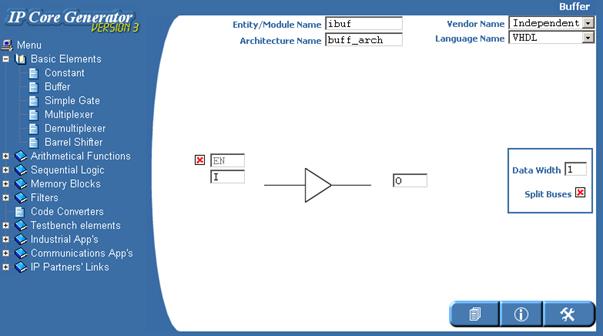
You have to generate buffer and D flip-flop.
First you will generate buffers.
• Open the Basic Elements category
• Select Buffer
• Enter ibuf for Entity and Architecture name
• Select VHDL as an language
• Deselect EN port
• Set ‘1’ for Data Width
• Press the Generate button
• • Enter obuf for Entity
and Architecture name Press the Generate button
once again
C.9 Importing Foundation Designs
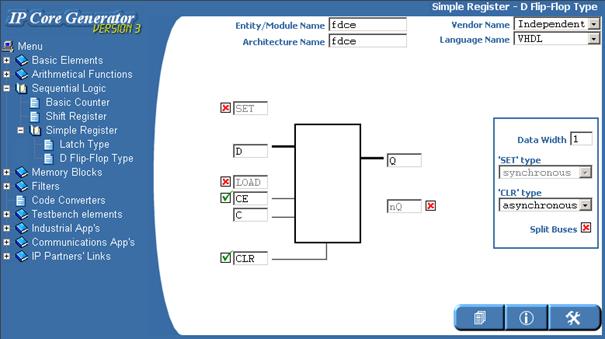
Now you will generate D flip-flop. You have to generate exactly this same D flip-flop like Xilinx primitive.
• Open the Sequential Logic category
• Open the Simple Register subcategory
• Select D Flip-Flop Type
• Enter fdce for Entity and Architecture name
• Select VHDL as an language
• Deselect SET, LOAD and nQ
ports
• Change CLK port name to C
• Set ‘1’ for Data Width
• Set CLR type as asynchronous
• Press the Generate button
C.10 Importing Foundation Designs
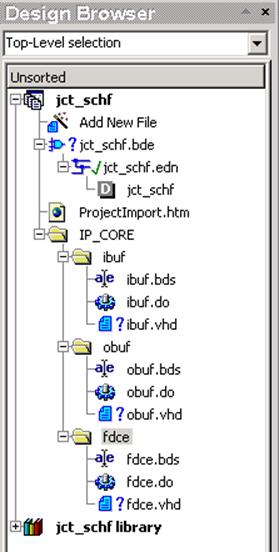
The IP CORE Generator has generated three subfolders.
There is DO macro in every subfolder. This macro compile core and generate symbol for it.
• Execute all macros.
C.11 Importing Foundation Designs
Now you are able to replace Xilinx primitives with generated cores.
Don’t worry, you
don’t have to make it manually.
You can use the Exchange library.
• Run the Change Library from the Design menu
• Select spartanx library in the Replace symbols… dialog box
• Select jct_schf (your design library)
in the with symbols… dialog box
• Press the OK button
And all symbols will be replaced.
C.12 Importing Foundation Designs
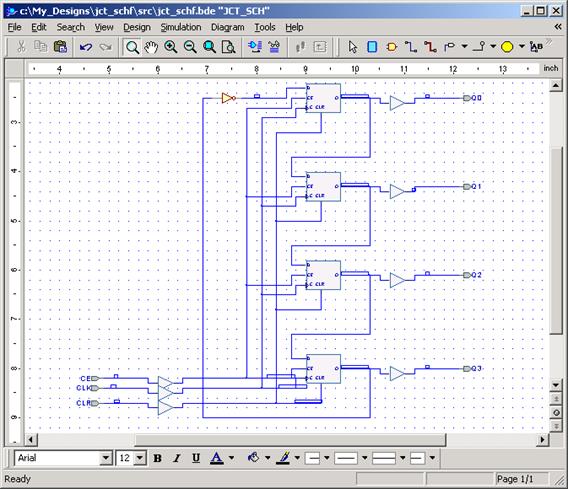
And now you have fully converted design!
You can compile the block diagram,
You can also synthesize it to any other vendors devices.
Appendix D
How to use
Verilog PLI
D.1 How to use Verilog PLI
To create your own
PLI function, you can use any C/C++ compiler.
As a result, you should have a DLL file.
This DLL file could be attached to Verilog simulator. When this DLL file is
attached, you can use your own PLI functions in Verilog source code.
Уважаемый посетитель!
Чтобы распечатать файл, скачайте его (в формате Word).
Ссылка на скачивание - внизу страницы.