• Open the Signal Alias Editor (Tools | Signal Alias Editor)
• Create an alias called LED_DECODE and fill the Value-Mnemonic pairs as shown in the picture
• Simulation -> Initialize Simulation
• Open the Signal Alias Editor (Tools | Signal Alias Editor)
• Create an alias called LED_DECODE and fill the Value-Mnemonic pairs as shown in the picture
• Simulation -> Initialize Simulation
1.19 Creating a Behavioral Design
• In the Waveform Editor, right-click on the LED signal and from the context menu choose Properties.
• Change the signal radix to Binary
• Select the Use Alias checkbox and choose LED_DECODE in the combo box
• Confirm your changes - click OK
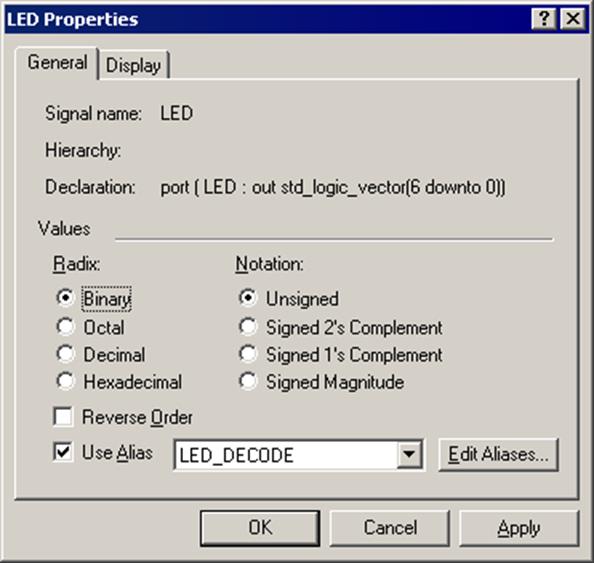
1.20 Creating a Behavioral Design
• In the context menu for HEX signal, choose Stimulators
• Select the Counter stimulator type
• Click Apply and then Close
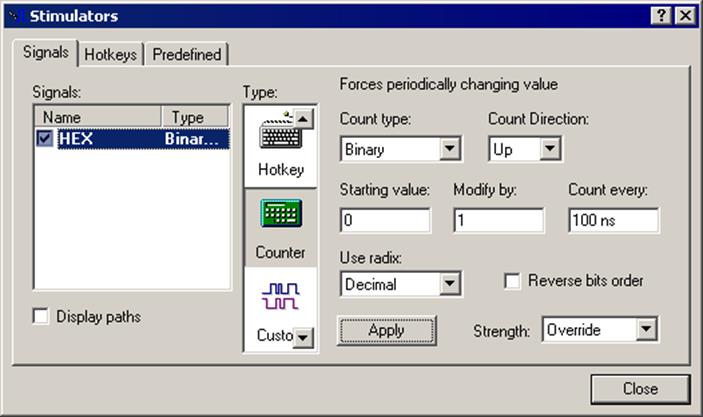
1.21 Creating a Behavioral Design
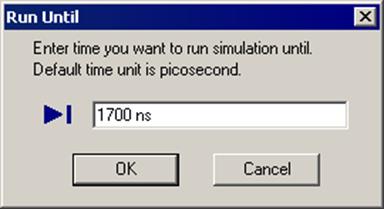
• From the Simulation menu choose the Run Until option
• In the dialog, specify the simulation time 1700 ns
The waveform should look as in the picture below

• From the Simulation menu, choose End Simulation
2.1 CNT_BCD module description
• CNT_BCD is a synchronous BCD counter. It has the following input ports:
– CLK - system clock
– GATE - count enable
– RESET - asynchronous RESET
and output ports:
– BCD_A, BCD_B, BCD_C, BCD_D - 4 output tetrads
Note: Do not create new file for this yet. You will be prompted to make this module in the future.
2.2 Creating CNT_BCD module
• CNT_BCD has 4 tetrads (CNT_4b decade counters). The counting range is between 0 and 9999. The device counts when GATE signal is set to ‘1’. When RESET=‘1’, the counter is reset.
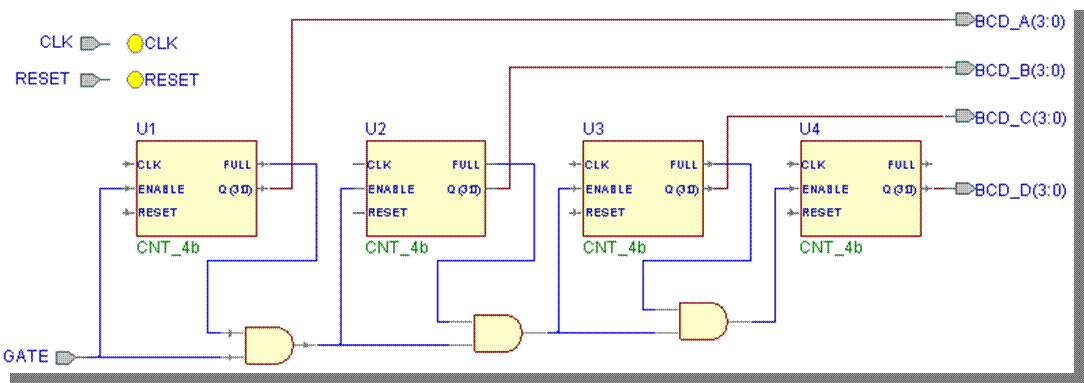
2.3 Creating CNT_BCD module
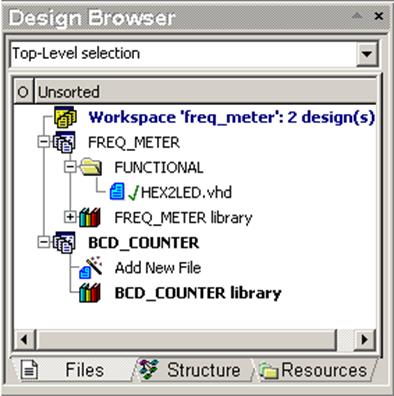
• We will create a separate design for this module within freq_meter Workspace
• From the Workspace menu, choose Add New Design to Workspace
• Follow the New Design Wizard to create a new empty design called BCD_COUNTER
2.4 CNT_4b module description
• The CNT_4b decade counter has the following ports:
– input ports (std_logic):
• CLK - clock
• RESET - asynchronous reset
• ENABLE - count enable
– output ports:
• FULL (std_logic) - FULL=1 when Q=9 and FULL=0 when Q¹9
• Q (std_logic_vector (3 downto 0)) - the counter output
2.5 Creating the CNT_4b module
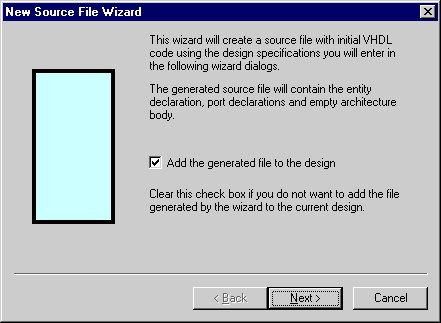
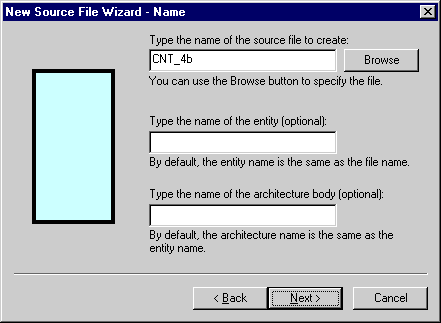
• Use the New Source File Wizard to
create the CNT_4b component. (Select File | New | VHDL source
from the menu,
click Next> in the first wizard screen, type CNT_4b file name
and click Next> in the second wizard screen)
2.6 Creating the CNT_4b module
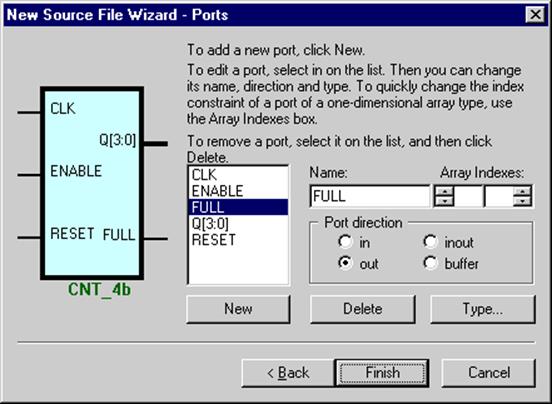
• Add the input ports of the STD_LOGIC type:
– CLK
– ENABLE
– RESET
• Add the output port of the STD_LOGIC_VECTOR type:
– Q[3:0]
• Add the output port of the STD_LOGIC type:
– FULL
Click Finish
2.7 Creating the CNT_4b module
• Now, type in the code shown here so that the architecture for CNT_4b becomes as shown.
• Yes, that's right:
type it in!
• No, there is no exact template for this in the language assistant
• Now, type in the code shown here so that the architecture for CNT_4b becomes as shown.
• Yes, that's right:
type it in!
• No, there is no exact template for this in the language assistant
2.8 Compiling the CNT_4b module
• Save and compile the CNT_4b.vhd file
Уважаемый посетитель!
Чтобы распечатать файл, скачайте его (в формате Word).
Ссылка на скачивание - внизу страницы.