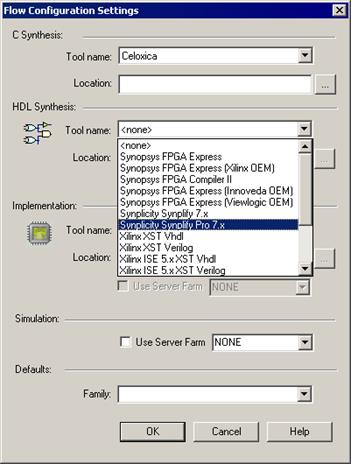
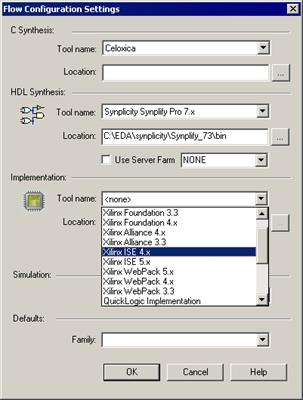
A.5 Flow Configuration
• Select the synthesis tool
• Specify the path to your synthesis tool if necessary
• Select the implementation tool
• Specify the path if necessary
• Select the family of devices
• Press the OK button
A.6 Synthesis
When the Flow is configured and your design is ready, you can start synthesis.
To set the synthesis options, press the Options button located to the left of the Synthesis button
The Synthesis Options window will appear.
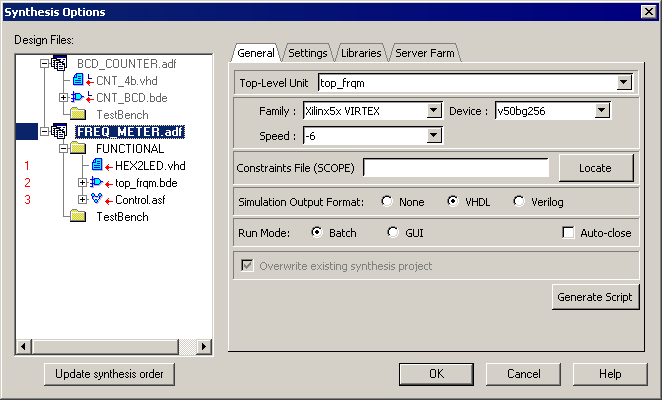
A.7 Synthesis
In the General tab you have to select the top level unit and device etc.You can specify more options that will be passed to the synthesis tool with the additional tabs
You can use context menus to select files which should be synthesized.
To add to synthesis files from the BCD_COUNTER library, right click on the BCD_COUNTER.adf icon and select Add all files to library
A.8 Synthesis
Now you can press the Synthesis button to run the synthesis process.
The new Synthesis
window will appear.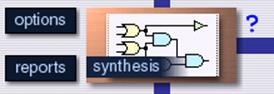
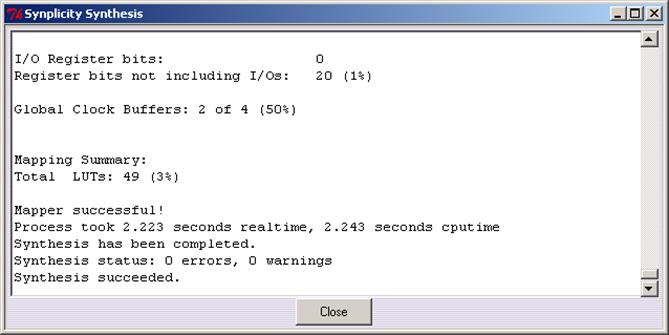
Synthesis is working in batch mode so you can use Active-HDL during synthesis process.
A.9 Synthesis
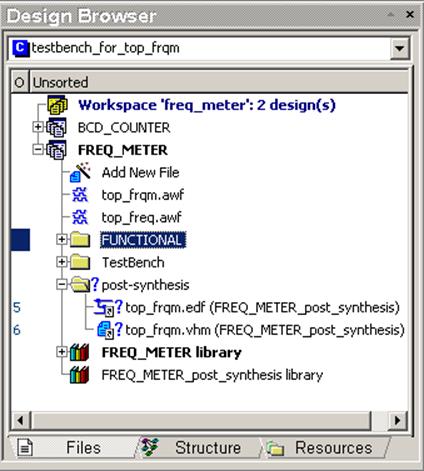
A new post-synthesis folder will be created in your design. Links to all post-synthesis netlist files will be located in this directory.
A new post-synthesis library will also be added to your design.
When you compile your synthesis files, design units will be compiled into this new library.
A.10 Post-synthesis Simulation
Now you are ready to run post-synthesis simulation. You can use the same testbench model as for behavioral simulation.
Press the Options button located near the Post-synthesis simulation button.

The Post-synthesis Simulation Options window will appear.
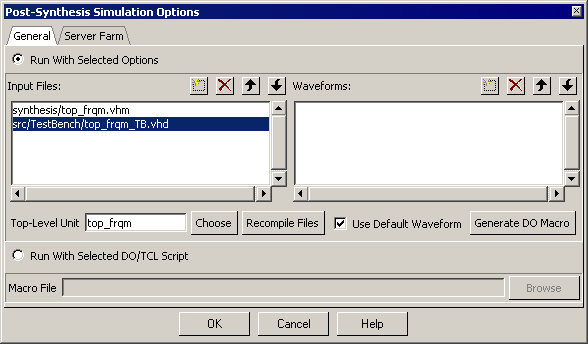
A.11 Post-synthesis Simulation
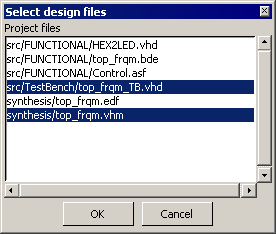
• Press the Select Design Flies icon
• Select synthesis/top_frqm.vhm
and src/TestBench/top_frqm_TB.vhd
files
• Set proper files in order using arrow buttons
• Recompile files.
• Chose top_frqm_tb as top-level.
• Save DO-macro as synthesis.do
• Press the OK button
A.12 Post-synthesis Simulation
• Open synthesis.do macro file
• Modify line
wave -ports *
to
wave –signals *
• Add lines
run –all
endsim
before line
label end
• Save changes
• Close all files
• Execute this macro
• Open synthesis.do macro file
• Modify line
wave -ports *
to
wave –signals *
• Add lines
run –all
endsim
before line
label end
• Save changes
• Close all files
• Execute this macro
A.13 Post-synthesis Simulation
The Simulation will be made. All results will be displayed on the created waveform.
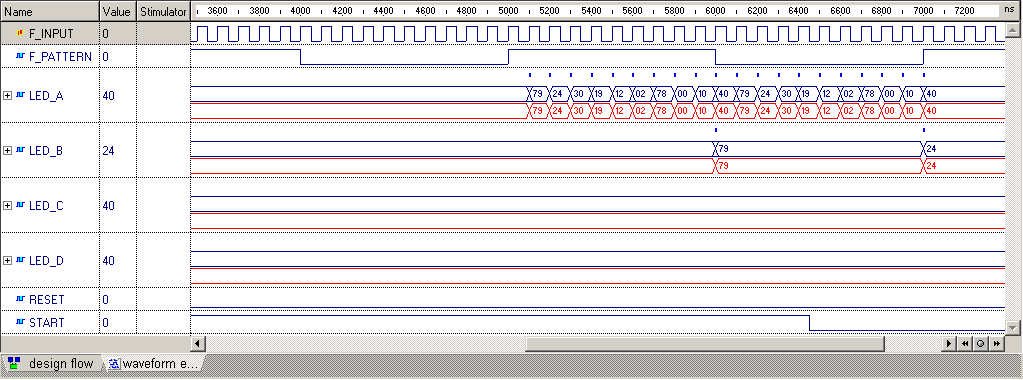
Now you can compare results with behavioral simulation. Use the Compare Waveforms option from the Waveform menu or button.
Open the TOP_FREQ.AWF waveform.
NOTE: Depending on the synthesis tool and its version you may observe some differences caused by delays infered in synthesis simulation netlist.
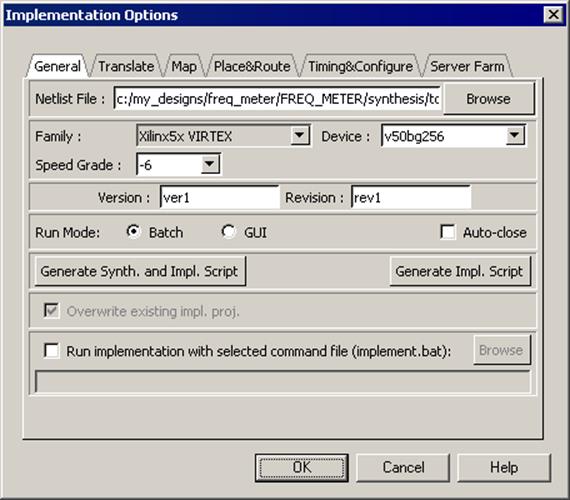
A.14 Implementation
If results of synthesis are satisfactory, you can start implementation.
To set implementation options, press the Options button to the left of the Implementation button.
In most cases you don’t have to configure this option because it is made automatically based on synthesis options.
A.15 Implementation
In the General tab you can select Netlist file to be sent to implementation, change device and mode (Batch/GUI).Additional tabs allow you to change and customize options available in your implementation tool.
Уважаемый посетитель!
Чтобы распечатать файл, скачайте его (в формате Word).
Ссылка на скачивание - внизу страницы.