Set Default: When enabled, allows the user to select one of the values in the grid and then click the button to set the chosen value as the default. Once set, the text of the default value displays as red in the grid. If the selection is on an empty row when Set Default is clicked, no default is set, or if a default was previously set, it is not changed. If “Use a value from the list as the default entry for the field” is subsequently unchecked, the default value is not remembered.
Data entry options (group): These options determine the allowable operations when entering data into a custom field that has an associated value list.
Restrict field to items in the value list: When selected (the default), specifies that the only values allowed in the custom field are the items that already exist in the value list. When this option is selected, both the “Append new entries to the value list” and “Prompt before adding new entries” checkboxes are cleared and disabled.
Allow additional items to be entered into the field: When selected, specifies that the custom field can contain values that are not already in the existing value list. When entering data, the user can select from the existing choices in the drop-down, type in the name of an existing choice, or type in any new items. When selected, this item also enables the “Append new entries to the value list” checkbox.
Append new entries to the value list: When selected, if the user types in the name of an item that is not already in the value list, the item is added to the grid in the Value List dialog, and is then available in the drop-down list for new and existing tasks. The position where the new item appears in the value list drop-down is determined by the Display order setting.
If this checkbox is not checked and the user types in the name of an item that is not already in the value list, the item is displayed in the custom field, but it is not added to the value list and will not appear in the drop-down for the custom field.
When checked, this option also enables the “Prompt before adding new entries” checkbox.
Prompt before adding new entries: When checked, specifies that whenever a new value is typed in that is not in the value list, the prompt shown below will be displayed for the user to confirm that they want to add the value to the list.
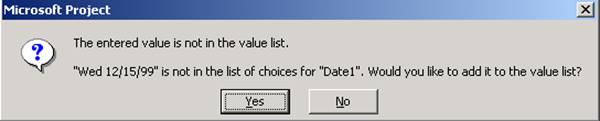
Figure 9 - Value not in the Value list
Display order for drop-down list (group): These options determine how value list items will be arranged in the drop-down picklist for the custom field, and also how they will be arranged in the grid the next time the Value List dialog for the field is opened. While editing the Value List dialog, the order of the items is not changed except for items inserted, deleted or moved by the user, but when the dialog is closed and reopened, items are rearranged according to the option chosen.
By row number: This is the default option. When switching from one of the sorted options to this option, the items will remain in their current positions.
Sorted ascending: This option specifies that the items in the drop-down list will be rearranged in a standard ascending sort order (lowest to highest) for the type of field selected. With this item selected, the items in the grid will be sorted in ascending order each time the dialog is closed and reopened.
Sorted descending: Similar to the Sorted ascending option, except that items will be arranged in descending sort order (highest to lowest).
Import Value List: Opens the Import Value List dialog, so that the user can copy a value list from a field in the Global template, from another open project, or from another custom field in the current project. Only the grid data is imported.
Because no data verification is done during the import process, it is possible for the user to import data of a type that does not match the field currently being edited. In this case, any error messages due to type mismatches will be generated when the user next clicks OK to close Value List dialog.
Уважаемый посетитель!
Чтобы распечатать файл, скачайте его (в формате Word).
Ссылка на скачивание - внизу страницы.