
Surfaces can be edited as primitives or power surfaces. Surfaces can be edited as a whole item or the curves that make up the surface can be edited.
· Select Create New Model. ![]()
· Create a workplane at 0.
· Create a torus of major radius 40 and minor radius 15 at 0.
· Convert the torus into a Power surface.

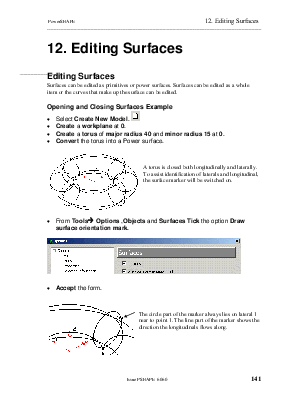
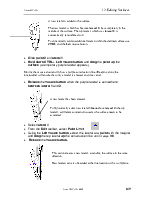
A torus is closed both longitudinally and laterally. To assist identification of laterals and longitudinal, the surface marker will be switched on.
· From Toolsè Options ,Objects and Surfaces Tick the option Draw surface orientation mark.

· Accept the form.

![]() The
circle part of the marker always lies on lateral 1 near to point 1. The line
part of the marker shows the direction the longitudinals flows along.
The
circle part of the marker always lies on lateral 1 near to point 1. The line
part of the marker shows the direction the longitudinals flows along.
· Double click the surface (opens surface edits toolbar and may also open the curve edits toolbar if selected on a curve).
· From the surface toolbar select Direction longitudinal.
![]()
This means that the commands will be applied in the longitudinal direction

· From the surface toolbar select Open surfaces.

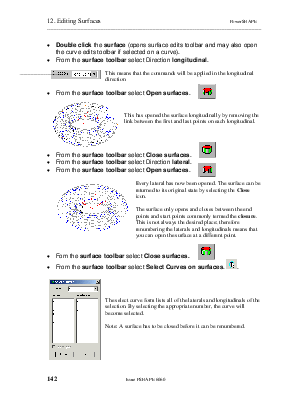
This has opened the surface longitudinally by removing the link between the first and last points on each longitudinal.

· From the surface toolbar select Close surfaces.
·  From the surface toolbar
select Direction lateral.
· From the surface toolbar select Open surfaces.
 Every
lateral has now been opened. The surface can be returned to its original state
by selecting the Close icon.
The surface only opens and closes between the end points and start points commonly termed the closure. This is not always the desired place; therefore renumbering the laterals and longitudinals means that you can open the surface at a different point.

· Fom the surface toolbar select Close surfaces.
· From the surface toolbar select Select
Curves on surfaces. ![]() .
.

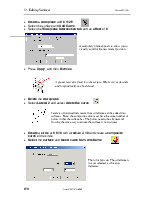
The select curve form lists all of the laterals and longitudinals of the selection. By selecting the appropriate number, the curve will become selected.
Note: A surface has to be closed before it can be renumbered.
· ![]() Select lateral 5.
Select lateral 5.
· From the surface toolbar select Renumber Surface.
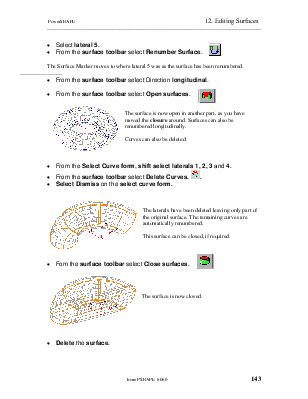
The Surface Marker moves to where lateral 5 was as the surface has been renumbered.
· From the surface toolbar select Direction longitudinal.

· From the surface toolbar select Open surfaces.

The surface is now open in another part, as you have moved the closure around. Surfaces can also be renumbered longitudinally.
Curves can also be deleted.
· From the Select Curve form, shift select laterals 1, 2, 3 and 4.
· From the surface toolbar select Delete
Curves. ![]() .
.
· Select Dismiss on the select curve form.

The laterals have been deleted leaving only part of the original surface. The remaining curves are automatically renumbered.
This surface can be closed, if required.
·  Fom the surface toolbar
select Close surfaces.

The surface is now closed.
· Delete the surface.
Points on laterals and longitudinals can be moved around to change the shape of the surface.
When creating any surface, the accuracy is controlled by the general tolerance. To ensure that the required number of laterals are generated, the tolerance will be edited, just for this example.
· From the bottom of the screen, Set the tolerance as 0.02.
![]()
· Create a torus at 0 with a major radius of 75 and a minor radius of 15.
· Convert the surface.
· ![]() Double click on a longitudinal
to bring up the Surface Editing and Curve Editing toolbars.
Double click on a longitudinal
to bring up the Surface Editing and Curve Editing toolbars.
· From the curve edit toolbar select Turn Point Labels On/Off.

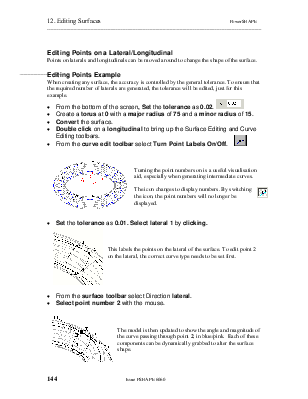
Turning the point numbers on is a useful visualisation aid, especially when generating intermediate curves.
![]() The
icon changes to display numbers. By switching the icon, the point numbers will
no longer be displayed.
The
icon changes to display numbers. By switching the icon, the point numbers will
no longer be displayed.
· Set the tolerance as 0.01. Select lateral 1 by clicking.

This labels the points on the lateral of the surface. To edit point 2 on the lateral, the correct curve type needs to be set first.
· From the surface toolbar select Direction lateral.
· Select point number 2 with the mouse.

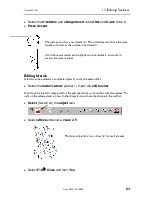
The model is then updated to show the angle and magnitude of the curve passing through point 2, in blue/pink. Each of these components can be dynamically grabbed to alter the surface shape.
![]()

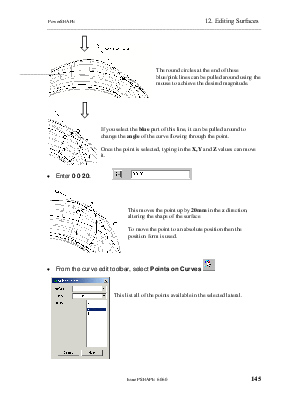
The round circles at the end of these blue/pink lines can be pulled around using the mouse to achieve the desired magnitude.
![]()

If you select the blue part of this line, it can be pulled around to change the angle of the curve flowing through the point.
Once the point is selected, typing in the X,Y and Z values can move it.
![]()
· Enter 0 0 20.

This moves the point up by 20mm in the z direction, altering the shape of the surface
To move the point to an absolute position then the position form is used.
· From the curve edit toolbar, select Points on Curves ![]()

This list all of the points available in the selected lateral.

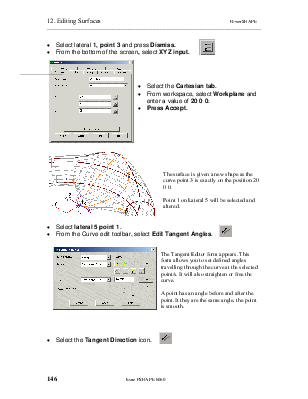
· Select lateral 1, point 3 and press Dismiss.
· From the bottom of the screen, select XYZ input.

· Select the Cartesian tab.
· From workspace, select Workplane and enter a value of 20 0 0.
· Press Accept.

The surface is given a new shape as the curve point 3 is exactly on the position 20 0 0.
Point 1 on Lateral 5 will be selected and altered.
· ![]() Select lateral 5 point 1.
Select lateral 5 point 1.
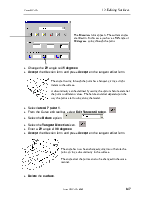
· From the Curve edit toolbar, select Edit Tangent Angles.

The Tangent Editor form appears. This form allows you to set defined angles travelling through the curve at the selected point/s. It will also straighten or free the curve.
Уважаемый посетитель!
Чтобы распечатать файл, скачайте его (в формате Word).
Ссылка на скачивание - внизу страницы.