|
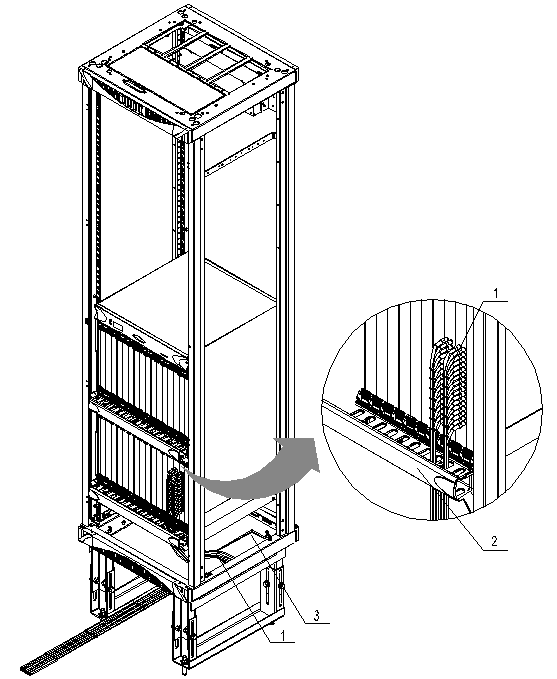
1. STM-1 cable |
2. Subrack cabling trough |
3. Cabling hole for signal cables |
Figure 7-12 Wire the STM-1 cable in downward cabling mode
7.2.3 Installation Check
n The cables are bound with appropriate tightness. The space between the cable ties should be even and the overall appearance of the cabling nice. All cable ties should face the same direction.
n The cables and connectors are intact and connected correctly and firmly.
n The cables should be laid in such a way as to facilitate maintenance and capacity expansion.
n The actual cable routing complies with the design.
7.3 Installing Alarm Cables
|
Overview |
This section tells you the procedures and precautions for installing and routing the external alarm cables. The OptiX OSN 9500 can input 16 channels of alarm, output 4 channels of alarm, and drive the cabinet indicators through EMPU. EMPU connects, through the interfaces on it and external alarm cables (including alarm input cables, alarm output cables and alarm concatenation cable), to the cabinet indicators, the head cabinet in each row, and the centralized alarm monitoring system in the equipment room. External alarm cables, external synchronization timing cable, and Ethernet cable are wired along the same route, so they can be installed together on the site of project. |
|
Prerequisites |
n Check the construction condition The alarm monitoring system in the equipment room has been installed properly, with interfaces reserved for use in this installation. n Check the cabling route Work out the lengths of the external alarm cables according to the cabling route, as specified in the construction documents, between the cabinet and the alarm monitoring system in the equipment room. n Check installation materials All installation materials are complete and intact. n Fill in cable labels Before cabling, you must fill in the cable labels according to “Appendix D Engineering Labels for Cables”. |
|
Reference |
For detailed information about the interfaces on EMPU and about the alarm cables, refer to OptiX OSN 9500 Intelligent Optical Switching System Hardware Description Manual. |
|
Installation materials |
n Alarm output cables n Alarm input cables n Alarm concatenation cable n Labels for external alarm cables n Cable tie |
7.3.1 Procedures in Upward Cabling Mode
![]() Caution:
Caution:
In most cases, the cabinet indicator driving cable has been wired before delivery. When necessary, install it on the site at the position as shown in Figure 7-14. It can be installed in the same way as external alarm cables in upward cabling mode.
|
Step |
Operation |
|
1 |
Determine the external alarm cables (as shown in Figure 7-13) and their pin assignment (as shown in Table 7-3, Table 7-4, Table 7-5, and Table 7-6). Figure 7-14 shows the positions for alarm interfaces. |
|
2 |
Before installing the cables, attach temporary marks to their both ends for distinguishing. |
|
3 |
Connect connectors of the external alarm cables to the interfaces on EMPU. |
|
4 |
Wire the external alarm cables on the left in the subrack cabling trough below EMPU and lead them out. Route them upward along the post and then route them to pass through the cabling hole for signal cables on the top of the cabinet, as shown in Figure 7-15. |
|
5 |
Bind the external alarm cables properly, as shown in Figure 7-15. |
|
6 |
Remove the temporary marks and attach the cable labels 2 cm away from the connectors at the two ends. In doing so, refer to section 7.2 “Installing STM-1 Cable”. |
Уважаемый посетитель!
Чтобы распечатать файл, скачайте его (в формате Word).
Ссылка на скачивание - внизу страницы.