PowerSHAPE is a Modelling package, which comprises of a Core module and several specialised modules. These are PS-Draft (generating detailed drawings), PS-Moldmaker (mould design), PS-Electrode (Electrode solid model wizard), PS-Estimator (basic estimating tools), PS-Assembly (Assemblies of solid models) and PS-Shoemaker (Shoe-wizard).
· To open PowerSHAPE, double click on the PowerSHAPE
icon. 
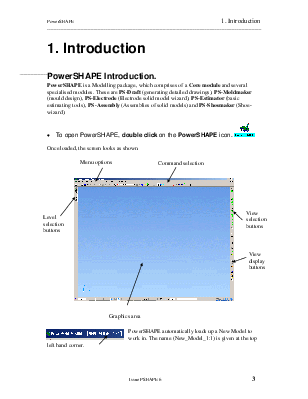
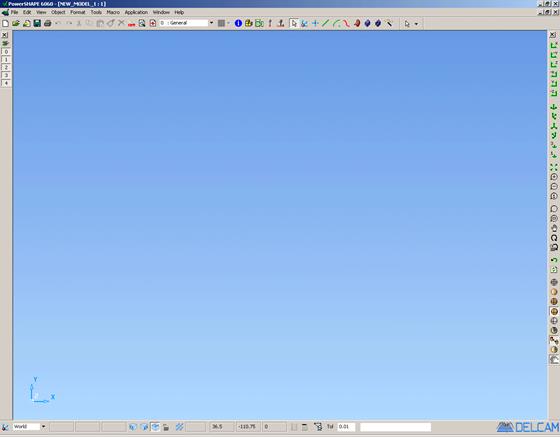
Once loaded, the screen looks as shown.
 |
|||
 |
|||
![]()
|
|


|
|
![]()
![]() PowerSHAPE automatically loads up a New Model to work in. The name
(New_Model_1:1) is given at the top left hand corner.
PowerSHAPE automatically loads up a New Model to work in. The name
(New_Model_1:1) is given at the top left hand corner.
This model can be saved as a new name or closed so a saved model can be opened up to work on. PowerSHAPE has the ability to have several models open and data can be copied from one model to another.
At the top of the screen there are a series of pull down menus.
![]()
· Select the File menu, using the Left mouse button.
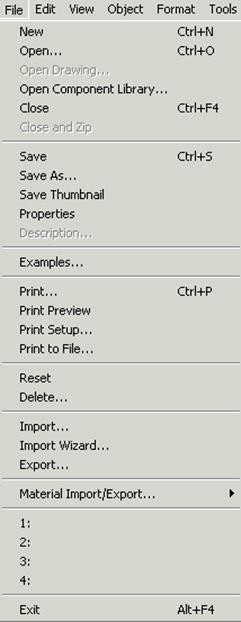
Any items showed grey are not available at this stage.
New, opens an empty model, Open, brings up a form of available models to choose from, Open Component Library opens the library to select a component and Close, closes the model.
Save, saves the model, Save As, ask for a new model name, Save Thumbnail takes a screenshot and saves as Thumbnail picture and Properties lists the entities in the model.
Examples, loads example models from a selected list.
Print, standard print options, Print Preview, displays the print layout, Print Setup, standard printer set up and Print to File allows rendered images and print files to be saved.
Reset, returns model to the last saved position and Delete, deletes the model.
Import, brings external model in from File Browser into PowerSHAPE, Export, saves selected model in export format. Wizards offer a step by step approach.
Materials Import/Export allows materials as .csv to be imported
This area has the last four models used listed and by picking them you can quickly open up the required model.
Exit, Closes PowerSHAPE
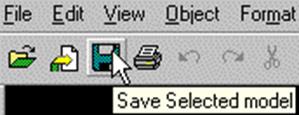 Beneath
the pull down menus are the icons which when pressed bring up a form or do an
action. The picture on the icon represents the action it will perform; for
example the one with the floppy disc will save your model.
Beneath
the pull down menus are the icons which when pressed bring up a form or do an
action. The picture on the icon represents the action it will perform; for
example the one with the floppy disc will save your model.
If you leave the mouse over an icon for a second, a description of the icon will appear.
To the right are the toolbar selectors and the layer and colour creation.
![]()

Next is the information button. When pressed this button opens a form giving the details of the selected items.
![]()
The next icons are the Product link icons, which are PS-Assembly, PS-Draft, CopyCAD and PowerMILL.
The PS-Assembly and PS-Draft alter the commands available within PowerSHAPE and are like on and off switches. The PowerMILL and CopyCAD icons will actually open up PowerMILL and CopyCAD.
The next button is the selector, workplane, point, line, arc, curve, surface, solid, feature and solid wizard.

The last icon contains a list of options for each of the creation types. This changes dependent upon which option is selected.
· Select the menu for line creation.

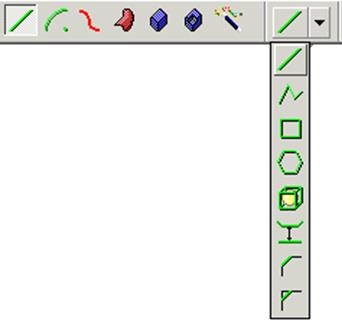

The pull down menu on the right now contains the following line command options by clicking on the down arrow icon. When these are selected they are loaded into the top of the menu by the arrow for quick re-selection when line mode is selected again.
At the bottom of the screen is the Workplane Selector, Principal Plane selector, the grid definition, the cursor position, the tolerance and the XYZ position input area.
![]()
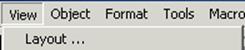
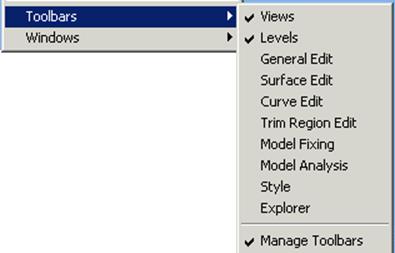
All of the toolbars, can also be switched on and off from the View pull down menu and selecting Toolbars è.
The Tools èOptions page allows you to configure PowerSHAPE and change the settings.
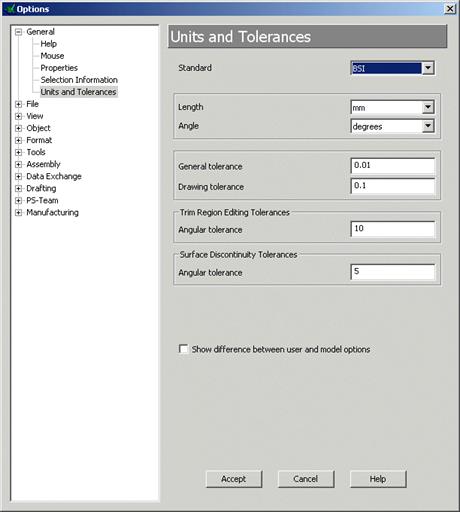
The options are stored under main categories.
By altering these options you can change how PowerSHAPE works and you can save these changes so that they are used every time you open PowerSHAPE. Alternatively you can make the changes just for this PowerSHAPE session.
· Under General select Properties.
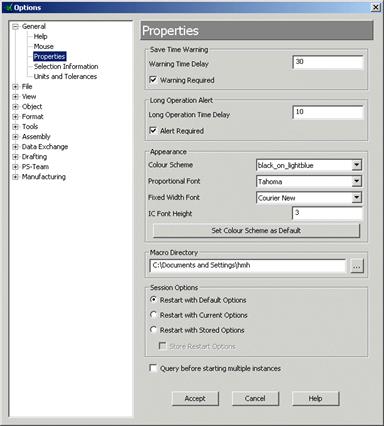
This is the main control area where you can save any changes and also set the time for PowerSHAPE to remind you to save the model.
· Select Cancel.
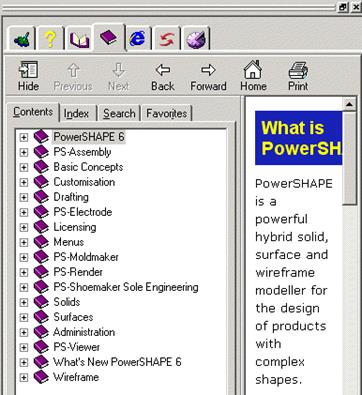
PowerSHAPE has an extensive Help index that can be accessed by either selecting Help from the top menu or by simply pressing F1 on the keyboard.
· Press F1 on the keyboard.
![]()
Уважаемый посетитель!
Чтобы распечатать файл, скачайте его (в формате Word).
Ссылка на скачивание - внизу страницы.