The model will be split into Core and Cavity and any gaps repaired using the commands Find Duplicates, Core / Cavity Separation, Stitch and Model Compare.
· Import the IGES file called cylstart.igs from Powershape_data/Iges.
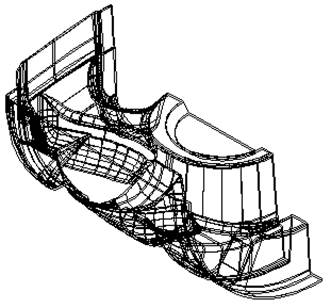
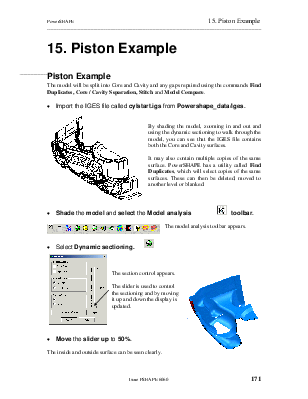
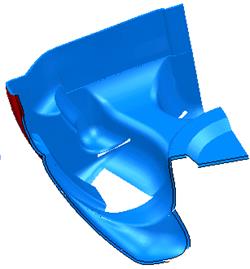
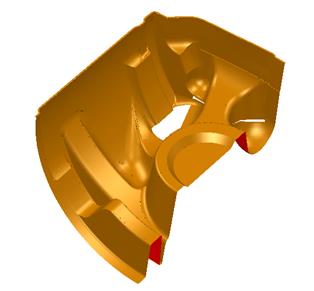
By shading the model, zooming in and out and using the dynamic sectioning to walk through the model, you can see that the IGES file contains both the Core and Cavity surfaces.
It may also contain multiple copies of the same surface. PowerSHAPE has a utility called Find Duplicates, which will select copies of the same surfaces. These can then be deleted, moved to another level or blanked.
![]()
· Shade the model and select the Model analysis toolbar.
![]() The
model analysis toolbar appears.
The
model analysis toolbar appears.
![]()
· Select Dynamic sectioning.
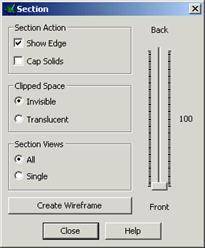
 The
section control appears.
The
section control appears.
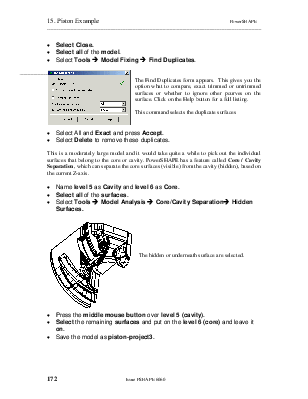
 The
slider is used to control the sectioning and by moving it up and down the
display is updated.
The
slider is used to control the sectioning and by moving it up and down the
display is updated.
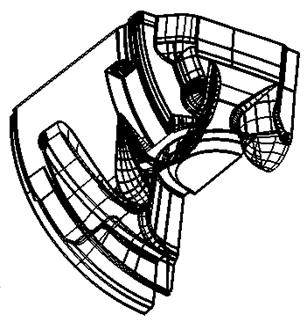
· Move the slider up to 50%.
The inside and outside surface can be seen clearly.
· Select Close.
· Select all of the model.
· Select Tools è Model Fixing è Find Duplicates.
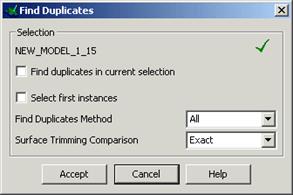
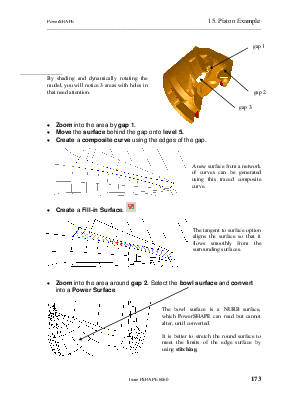
The Find Duplicates form appears. This gives you the option what to compare, exact trimmed or untrimmed surfaces or whether to ignore other pcurves on the surface. Click on the Help button for a full listing.
This command selects the duplicate surfaces
· Select All and Exact and press Accept.
· Select Delete to remove these duplicates.
This is a moderately large model and it would take quite a while to pick out the individual surfaces that belong to the core or cavity. PowerSHAPE has a feature called Core / Cavity Separation, which can separate the core surfaces (visible) from the cavity (hidden), based on the current Z-axis.
· Name level 5 as Cavity and level 6 as Core.
· Select all of the surfaces.
· Select Tools è Model Analysis è Core/Cavity Separationè Hidden Surfaces.
The hidden or underneath surface are selected.
· Press the middle mouse button over level 5 (cavity).
· Select the remaining surfaces and put on the level 6 (core) and leave it on.
· Save the model as piston-project3.


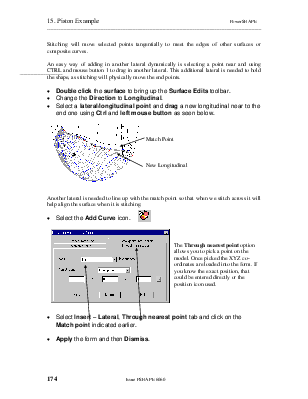
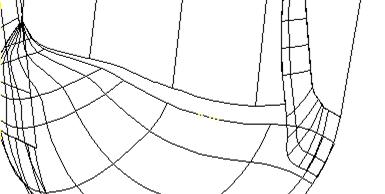
 By shading and dynamically rotating the
model, you will notice 3 areas with holes in that need attention.
By shading and dynamically rotating the
model, you will notice 3 areas with holes in that need attention.


· Zoom into the area by gap 1.
· Move the surface behind the gap onto level 5.
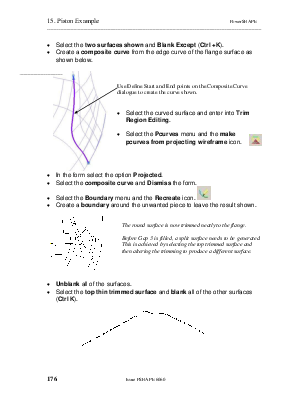
· Create a composite curve using the edges of the gap.
A new surface from a network of curves can be generated using this traced composite curve.
·
Create a Fill-in
Surface. ![]()
The tangent to surface option aligns the surface so that it flows smoothly from the surrounding surfaces.
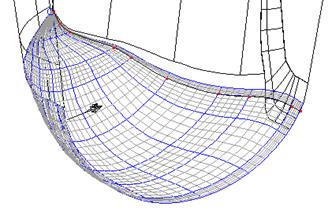
·  Zoom into the area around gap 2. Select the bowl surface
and convert into a Power Surface
Zoom into the area around gap 2. Select the bowl surface
and convert into a Power Surface
The bowl surface is a NURB surface, which PowerSHAPE can read but cannot alter, until converted.
It is better to stretch the round surface to meet the limits of the edge surface by using stitching.
Stitching will move selected points tangentially to meet the edges of other surfaces or composite curves.
An easy way of adding in another lateral dynamically is selecting a point near and using CTRL and mouse button 1 to drag in another lateral. This additional lateral is needed to hold the shape, as stitching will physically move the end points.
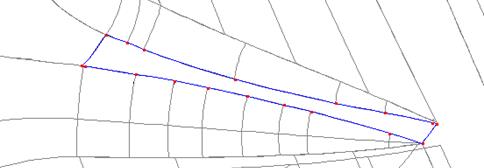
· Double click the surface to bring up the Surface Edits toolbar.
· Change the Direction to Longitudinal.
· Select a lateral/longitudinal point and drag a new longitudinal near to the end one using Ctrl and left mouse button as seen below.
![]() Match Point
Match Point

New Longitudinal
Another lateral is needed to line up with the match point so that when we stitch across it will help align the surface when it is stitching.
![]()
· Select the Add Curve icon.
![]()
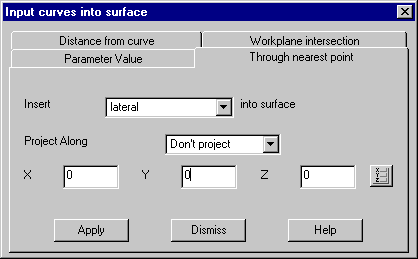
![]() The Through
nearest point option allows you to pick a point on the model. Once picked
the XYZ co-ordinates are loaded into the form. If you know the exact position,
that could be entered directly or the position icon used.
The Through
nearest point option allows you to pick a point on the model. Once picked
the XYZ co-ordinates are loaded into the form. If you know the exact position,
that could be entered directly or the position icon used.
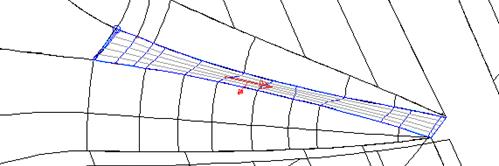
· Select Insert – Lateral, Through nearest point tab and click on the Match point indicated earlier.
· Apply the form and then Dismiss.


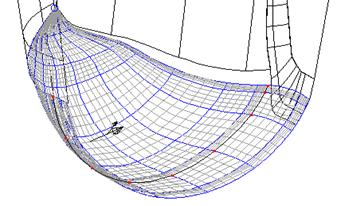
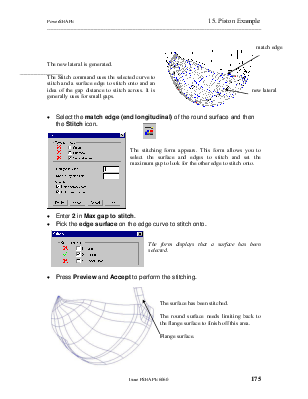
The new lateral is generated.

![]() The
Stitch command uses the selected curve to stitch and a surface edge to stitch
onto and an idea of the gap distance to stitch across. It is generally uses for
small gaps.
The
Stitch command uses the selected curve to stitch and a surface edge to stitch
onto and an idea of the gap distance to stitch across. It is generally uses for
small gaps.
·
![]() Select the match edge (end
longitudinal) of the round surface and then the Stitch icon.
Select the match edge (end
longitudinal) of the round surface and then the Stitch icon.
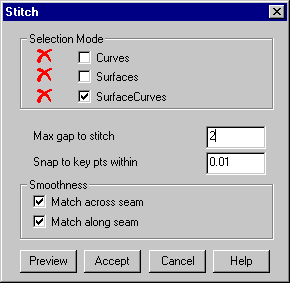
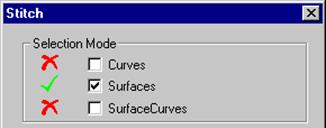
The stitching form appears. This form allows you to select the surface and edges to stitch and set the maximum gap to look for the other edge to stitch onto.
· Enter 2 in Max gap to stitch.
· Pick the edge surface on the edge curve to stitch onto.
Уважаемый посетитель!
Чтобы распечатать файл, скачайте его (в формате Word).
Ссылка на скачивание - внизу страницы.