Controlling measurement is in millimeters, shown in parenthesis. Inch measurements are for reference only “Dimension Formats” on page 2-22 of this data sheet for dimension formats.
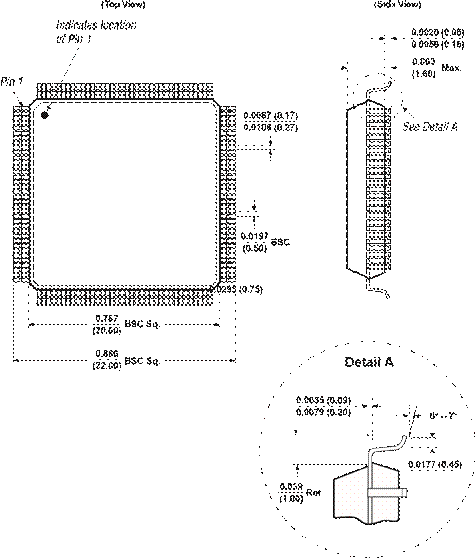
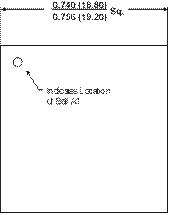
Controlling measurement is in inches. Millimeter measurements, shown in parentheses, are for reference only. See “Dimension Formats” on page 2-22 of this data sheet for dimension formats.
(Top View) (Bottom View) (Side View)
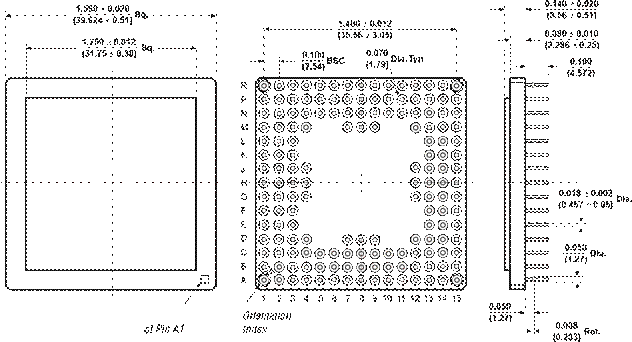 Indicates location
(Top View) (Side View)
![]() Indicates location
Indicates location
× 45° of Pin 1
“Dimension Formats” on page 2-22 of this data sheet for dimension formats.
(1)
![]()
![]() (1) Indicates
(1) Indicates
Location of
Ball A1

Note:
(1) The EPM7512B uses a thicker version of this package. Package thickness of this EPM7512B device is 1.6 mm typical and total package height is 2.2 mm maximum.
Controlling measurement is in inches. Millimeter measurements, shown in parentheses, are for reference only. See “Dimension Formats” on page 2-22 of this data sheet for dimension formats.
(Bottom View) (Side View)
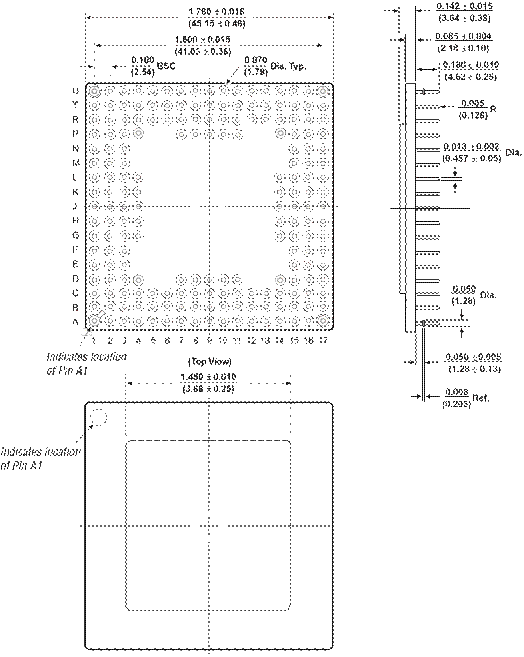
“Dimension Formats” on page 2-22 of this data sheet for dimension formats.
(Top View) (Bottom View) (Side View)
![]()
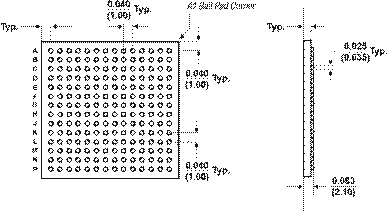 1413121110 9 8 7 6 5 4 3 2 1 Max.
“Dimension Formats” on page 2-22

“Dimension Formats” on page 2-22 of this data sheet for dimension formats. Metal heat sink is shown in the side view.
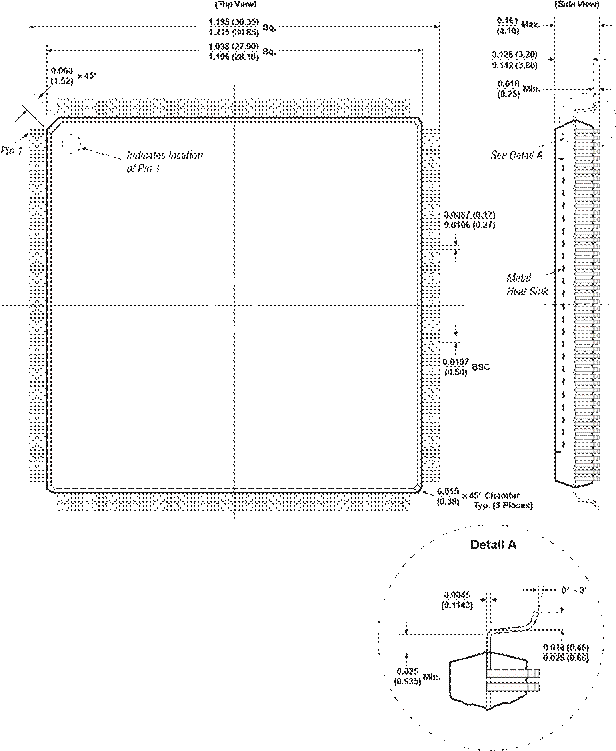
“Dimension Formats” on page 2-22
(Top View) (Bottom View)

0.045 (1.15)

Controlling measurement is in inches. Millimeter measurements, shown in parentheses, are for reference only. See “Dimension Formats” on page 2-22 of this data sheet for dimension formats.
(Top View) (Side View)
![]()
![]()
![]()
 Ref.
Ref.
Indicates location of Pin A1
“Dimension Formats” on page 2-22
![]() BSC
BSC
× 45° Chamber
Typ. (3 Places)
“Dimension Formats” on page 2-22 .

“Dimension Formats” on page 2-22 of this data sheet for dimension formats.
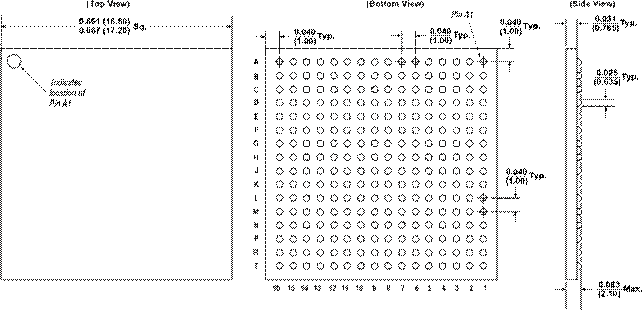
“Dimension Formats” on page 2-22 .

Controlling measurement is in inches. Millimeter measurements, shown in parentheses, are for reference only. See “Dimension Formats” on page 2-22 of this data sheet for dimension formats.
![]()
 × 45°
× 45°
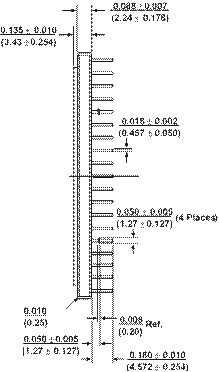
“Dimension Formats” on page 2-22 .
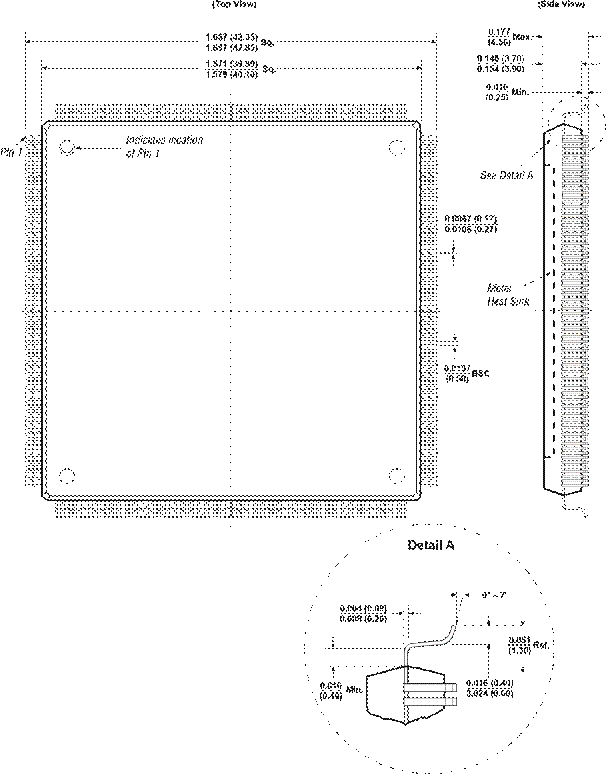
“Dimension Formats” on page 2-22 of this data sheet for dimension formats. Metal heat sink is shown in the side view.
(Top View) (Bottom View) (Side View)
![]()
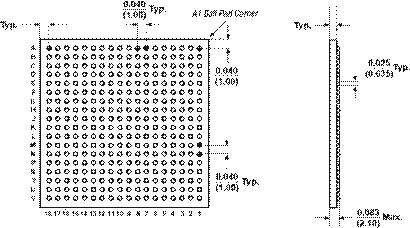 Typ.
Typ.
“Dimension Formats” on page 2-22 of this data sheet for dimension formats.

![]()
![]()
![]() (Side View)
(Side View)
Controlling measurement is in inches. Millimeter measurements, shown in parenthesis, are for reference only “Dimension Formats” on page 2-22 of this data sheet for dimension formats.
(Top View) (Side View)
![]()
![]() Typ.
Typ.
Dia. Typ. (0.46 ± 0.05)
of Pin A1 (not a pin) 0.020 Rad. Typ.
(0.51)
(4 Places)
“Dimension Formats” on page 2-22 of this data sheet for dimension formats.
(Top View) (Side View)

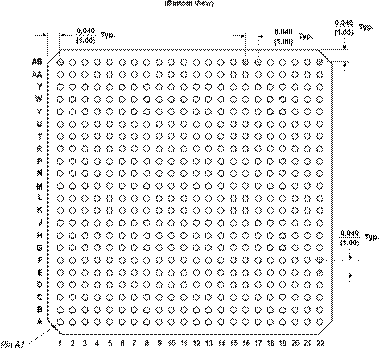
Controlling measurement is in inches. Millimeter measurements, shown in parentheses, are for reference only. See “Dimension Formats” on page 2-22 of this data sheet for dimension formats.
(Top View) (Side View)
![]() Dia. Typ.
Dia. Typ.
(Bottom View)
BSC
Controlling measurement is in inches. Millimeter measurements, shown in parentheses, are for reference only. See “Dimension Formats” on page 2-22 of this data sheet for dimension formats. Metal heat sink is shown in the side view.

Controlling measurement is in millimeters, shown in parentheses. Inch measurements are for reference only. See “Dimension Formats” on page 2-22 of this data sheet for dimension formats. Metal heat sink is shown in the side view.

Controlling measurement is in millimeters, shown in parentheses. Inch measurements are for reference only. See “Dimension Formats” on page 2-22 of this data sheet for dimension formats.
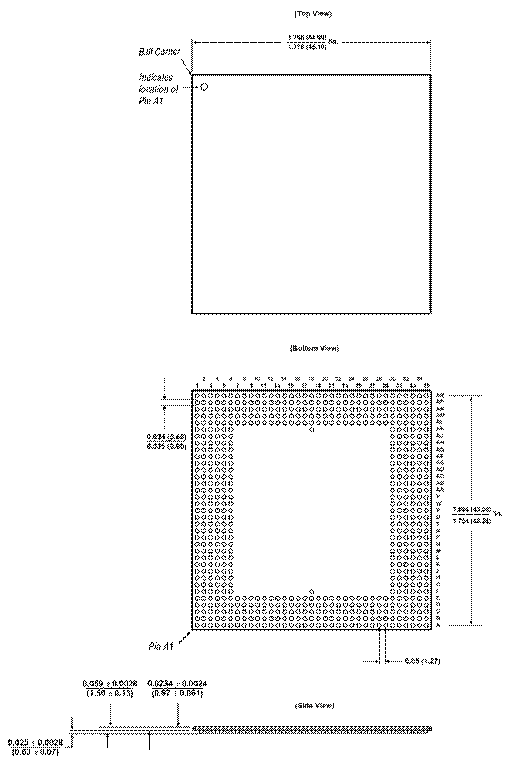
Controlling measurement is in inches. Millimeter measurements, shown in parentheses, are for reference only. See “Dimension Formats” on page 2-22 of this data sheet
Уважаемый посетитель!
Чтобы распечатать файл, скачайте его (в формате Word).
Ссылка на скачивание - внизу страницы.