Internet Explorer 5.1 is installed with Microsoft Project 2000. If you have no browser or a browser other than IE 5 (such as Netscape or Internet Explorer 4) installed on your system, you will be lead to the Updating Windows screen to install Internet Explorer 5.1. If you have Internet Explorer 5 installed, but not Internet Explorer 5.1, your browser will be updated automatically without displaying the Updating Windows screen.
Although Microsoft Project 2000 will work without installing Internet Explorer 5, it is recommended that the user choose to install it. Not installing Internet Explorer 5 can cause some features, such as on-line help, to not work.
If you already have Internet Explorer 5 or later installed on your system, (or once Internet Explorer 5 installation has been completed) you are taken to the Selecting Features screen. Here you can change the installation state of any of the features that ship with Microsoft Project 2000.

Figure 5 - Selecting Features
|
|
Installing Microsoft Project 2000 updates your MDAC components to version 2.5 automatically. There is no option to disable this during installation. |
Once you have selected the desired features, Microsoft Project 2000 is installed on the system.
|
|
Try This: Install Microsoft Project 2000 |
1. Run SETUP.EXE from the install location given you by the instructor.
2. Enter a user name, organization name, and your CD key as required. Click Next.
3. Agree to the license agreement and click next
4. Click Customize.
5. Install Project to the “C:\Program Files\Project 2000” directory. Click next.
6. Click Microsoft Project and choose Run all from My Computer.
7. Click Install Now.
Microsoft Project 2000 should then install to the designated directory.
If a previous version of Microsoft Project has been installed on the system, Microsoft Project 2000 setup behaves a little differently than noted above. At the Ready To Install screen, you are presented with the following two options: Upgrade Now and Customize.
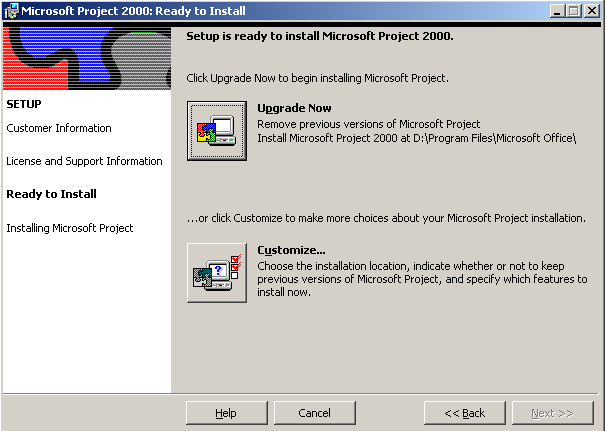
Figure 6 - Upgrade Ready to Install
Choosing Upgrade Now automatically uninstalls any previous versions of Microsoft Project that are on the system. It then installs Microsoft Project 2000 in the default location. If you choose Customize, you receive the same options as before with one exception. Between choosing the installation location and selecting features, (or Updating Windows if Internet Explorer 5 is not installed) you will get the Removing Previous Versions Screen. Here you have the option to keep or remove previous versions of Microsoft Project.
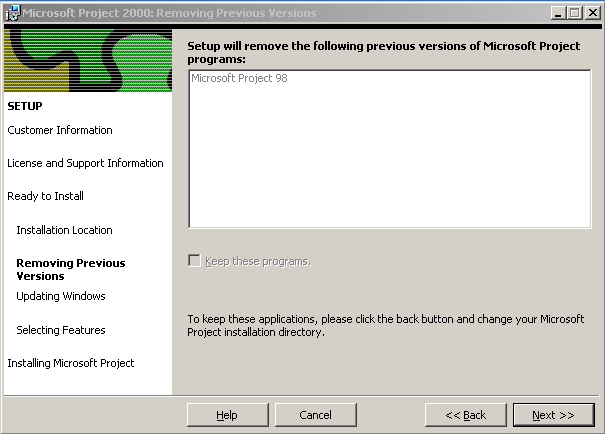
Figure 7 - Removing Previous Version
Other than uninstalling previous versions of Microsoft Project, installing Microsoft Project 2000 as an upgrade is not different than installing it as a new product.
|
Note |
If you have a previous version of Microsoft Project already installed on your system and you want to preserve the previous version, you should install Microsoft Project 2000 to a different folder. Please note that if the previous version is Microsoft Project 98, inserted projects, cross project dependencies and resource sharing links may not work as expected. Also, workgroup messaging features may not work as expected. Uninstalling Microsoft Project 2000 “fixes” the unwanted connection between the two versions.
Уважаемый посетитель!
Чтобы распечатать файл, скачайте его (в формате Word).
Ссылка на скачивание - внизу страницы.