More pcurves can be made by limiting the fillet to the plane.
· Open the Edits Toolbar ![]() and select the fillet
surface (cutting object).
and select the fillet
surface (cutting object).
· Select Limit selection ![]() , followed by the vertical surface
and toggle, next solution
, followed by the vertical surface
and toggle, next solution ![]() until the fillet is trimmed
correctly.
until the fillet is trimmed
correctly.
The correct trimming option for the fillet is achievable using Next Solution, but not for the vertical surface due to the complexity of it's pcurve network.
· Select and Blank Except (Ctrl + K) the vertical surface.
· Toggle into Boundary Edits and select and Explode
the boundary ![]() .
.
· Toggleinto P-curve Edits to display allexisting pcurves on the surface.
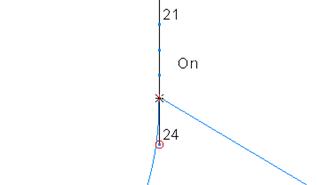
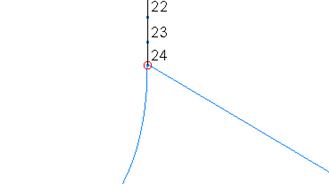
· Zoom into the lower left corner and select the vertical pcurve.
· Delete the last ppoints from the end up to one before the curved join.
· ![]() Label ppoints by clicking the Turn point labelling on/off icon
Label ppoints by clicking the Turn point labelling on/off icon
![]() .
.
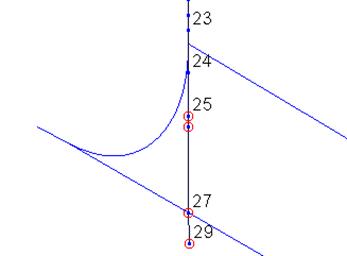
· Select the end ppoint (24) and select Edit parametric value at ppoint
![]()
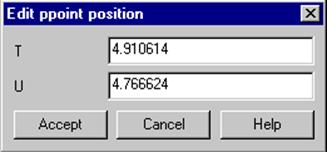
· Click the branch point situated before the last ppoint (24) and note the updating of the values in the above form (zoom in as close as possible).
· Click Accept and the position of the last ppoint (24) will update to the new parametric values.
The ppoint is now matched. This procedure can be used all on all the pcurves so that you can use the Autocreate boundary feature.
Alternatively, as long as the pcurves cross you can create a boundary using sketch.
· Select boundary edits and recreate
a new boundary. ![]()
· Select Unblank (Ctrl + L).
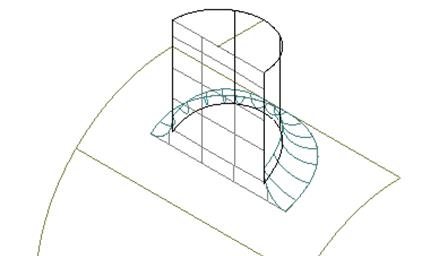
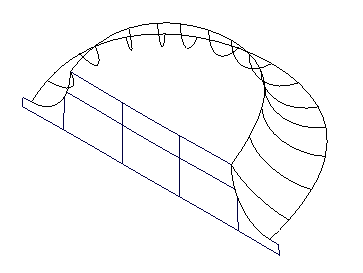
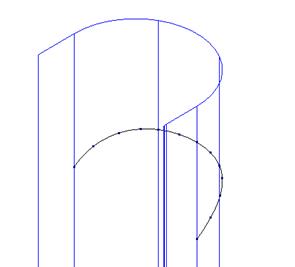
The vertical 'D' section surface shown below is the final surface that requires re-trimming.
· Blank all surfaces apart from the fillet and the vertical 'D' section.
·  Select the vertical
'D' section,surface and Delete it's Boundary.
Select the vertical
'D' section,surface and Delete it's Boundary.
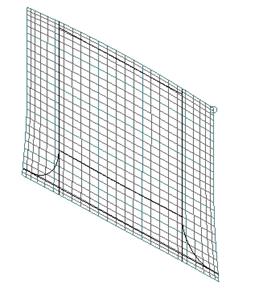
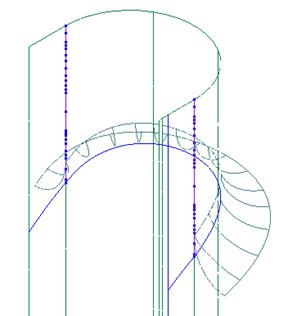
· Toggleinto P-curve Edits and delete all pcurves except the 2 running vertically from the ends of the fillet surface (shown dotted below).
· Create a composite curve by using ALT + left mouse button on the upper side of the fillet surface.
· Blank the fillet from the view and select the vertical 'D' section surface.
The composite curve will be turned into a pcurve on the surface by projecting it.
· Select P-curve Edits make pcurves from projecting wireframe
i![]()
· Select the option Projected and click on the composite curve
· Dismiss the form and delete the composite curve.
· Select the vertical 'D' section surface
· Select Boundary Edits.
· Select the icon Recreate ![]() and manually
generate the boundary to create the correctly trimmed, surface shown
below.
and manually
generate the boundary to create the correctly trimmed, surface shown
below.
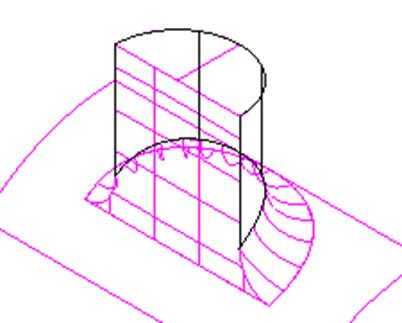
The surfaces are now trimmed to one another.
· Select Fileè Close and then Yes.
In this example an IGES file is imported that contains a badly trimmed split surface. With the help of the following suggestions, re-trim the surface.
· In Tools - Options, under Data Exchange/PS-Exchange, tick IGES in the Import section.
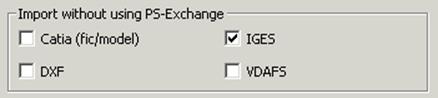
· Import the file jug_split_surfaces.ige from PowerSHAPE_data/iges.
To bring in unused pcurves PowerSHAPE IGES is used, not PS-Exchange. From the model, you can see that the split surface has a couple of gaps in it.
The first process is to select only the split surface and explode the bad boundary.
· Blank all surfaces except the split surface.
· Open the Trim Region Editing toolbar and select Boundary Edits.
· Delete Boundary 1.
· Select the P-curve Edits menu.
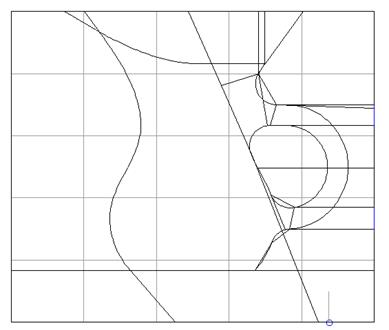
The surface contains a complex network of p-curves. The network is to be simplified by using a combination of options including delete p-curve, delete ppoint, extend p-curve, etc.
Pcurves need to be perfectly trimmed to enable automatic pcurve generation. When defining a boundary manually the pcurves do not have to be trimmed back as the required route is defined using the cursor.
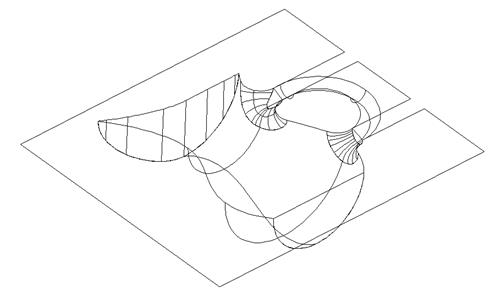
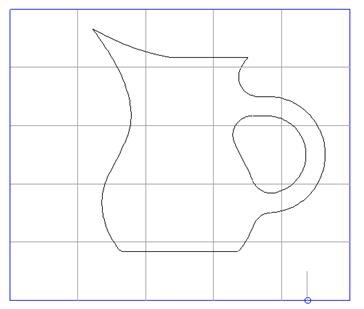
· Modify all the necessary P-Curves until the surface looks like this:
The next step is to create the Boundaries. Although an automatic boundary could have been made, trace the boundary around using the re-create boundary button.
· Use the recreate boundary icon and trace the outer boundary.
· Press Save, trace the inner boundary and then Save and Eject.
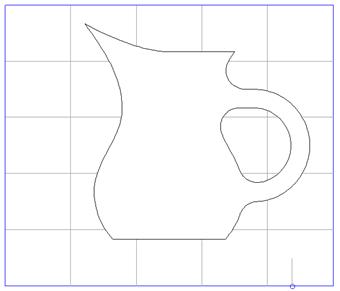
The surface should now be trimmed correctly otherwise Reverse the Boundary.
· Select File è Close and then Yes.
Уважаемый посетитель!
Чтобы распечатать файл, скачайте его (в формате Word).
Ссылка на скачивание - внизу страницы.