All user coding is finished. The built in code in CHEMCAD will put the stream data just stored by the user into the stream fields in CHEMCAD when OnExit runs. Save before closing the Visual Basic Editor.

In section one an Excel Unit Op which does not require user interaction was created. The next part of the tutorial uses a customized user added dialog box to allow user specification of the operating pressure of the mixer. This pressure is used for the flash calculation of the stream to obtain the stream properties.
The first step is to create the user added dialog box for the Excel Unit Op. The Excel1.MY file, which is found in the job directory just as the Excel1.xls file was, must be opened with the CHEMCAD Screen Builder program.

Use of the Screen Builder program is described in detail in the Screen Builder Help Document. If further clarification is needed for the commands used in Screen Builder, please consult that document.
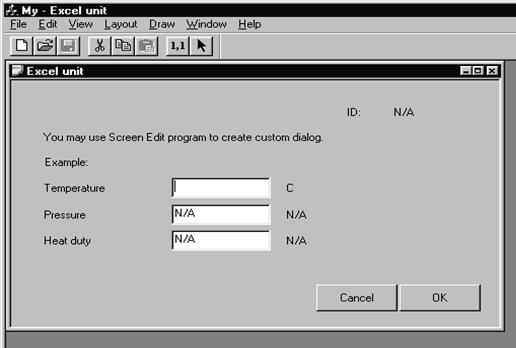
When the Excel1.MY file is opened, the screen should look as shown in the picture below.
Next choose Layout from the command menu, and then Edit from the Layout menu. Alternatively, press [ctrl] + [E].
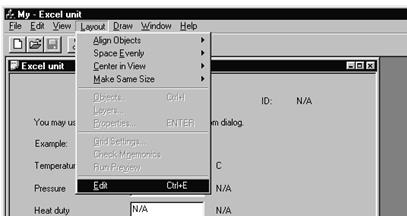
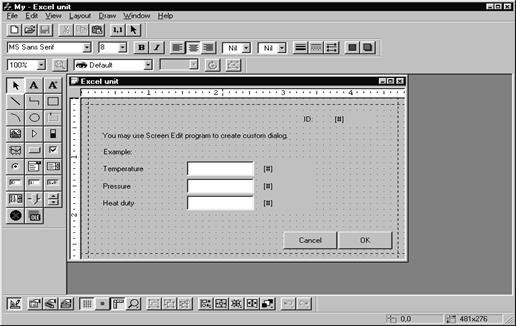
The screen should now look as below.
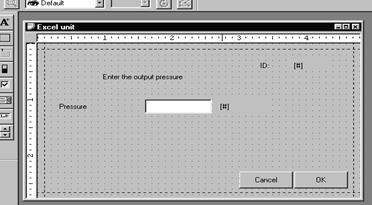
Click on the text label that reads “You may use Screen Edit program to create custom dialog”. Green squares appear to highlight this field. Edit the text in the box to read “Enter the output pressure”.
Now click on the text labeled “Example:” and the same green box should appear. Delete this text box by either using the delete button or from the toolbar choose Edit and the Cut. Repeat the same process to remove the text labels “Temperature” and “Heat duty”. Use the same process to remove r the two white boxes (EditDblBox1 and EditDblBox3) as well as the two [#] labels (TextVar1 and TextVar3) that are on the same row as the “Temperature” and “Heat duty” text labels. All that should be left is the text labeled “Pressure” , the enrtry field labeled “EditDBLBox2, and the [#] across from it. The way the box looks has been used for description here, but to read the entry field label, simply double click the box and the label will be shown. For example, double click the white box across from the “Pressure” text and the lable will be EditDblBox2. The screen should now look as seen below.
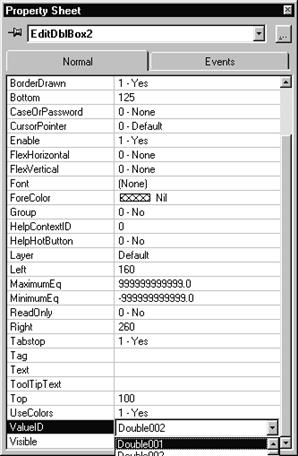 |
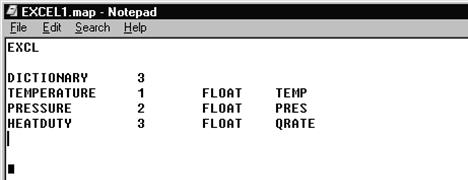
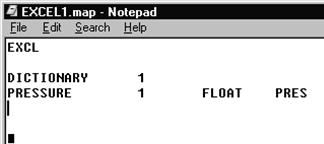
Now close the Property Sheet window for EditDblBox2 and save the file. Then close the program. The next file that needs to be changed is the Excel1.Map file. This is also found in the same directory as the Excel1.My file and the Excel1.xls file previously opened with this example. This file is opened with Notepad. The file will look similar to the one below.
 |
 |
Уважаемый посетитель!
Чтобы распечатать файл, скачайте его (в формате Word).
Ссылка на скачивание - внизу страницы.