|
2.1 Subrack Structure
2.1.1 Overall Structure of Subrack
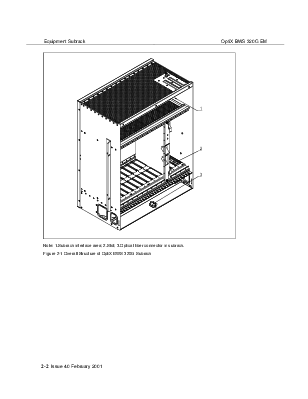
The subrack of OptiX BWS 320G system is divided into three parts: the upper part is interface area, all the electrical interfaces are connected from here; the middle part is used to accommodate the boards, totally 15 slots available; the lower part is fiber pigtail installed area. Subrack structure is shown in Figure 2-1.

Note: 1.Subrack interface area; 2.Slot; 3.Optical fiber connector in subrack.
Figure 2-1 Overall Structure of OptiX BWS 320G Subrack
2.1.2 Interface Area
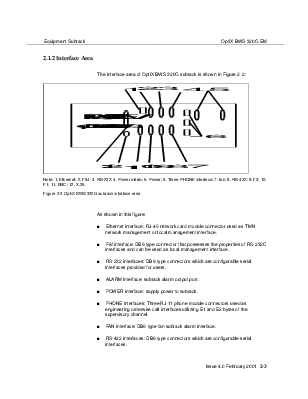
The interface area of OptiX BWS 320G subrack is shown in Figure 2-2:

Note: 1. Ethernet; 2. F&f ; 3. RS-232; 4. Power alarm; 5. Power; 6. Three PHONE interface; 7. fan; 8. RS-422; 9. F2; 10. F1; 11. BNC; 12. X.25.
Figure 2-2 OptiX BWS 320G subrack interface area
As shown in this figure:
n Ethernet interface: RJ-45 network card module connector used as TMN network management or local management interface.
n F&f interface: DB9-type connector that possesses the properties of RS-232C interfaces and can be used as local management interface.
n RS-232 interfaces: DB9-type connectors which are configurable serial interfaces provided for users.
n ALARM interface: subrack alarm output port.
n POWER interface: supply power to subrack.
n PHONE interfaces: Three RJ-11 phone module connectors used as engineering orderwire call interfaces utilizing E1 and E2 bytes of the supervisory channel.
n FAN interface: DB9-type fan subrack alarm interface.
n RS-422 interfaces: DB9-type connectors which are configurable serial interfaces.
n F1 interface: DB9-type connector used as co-directional 64kbit/s data communication interface provided.
n F2 interface: DB9-type connector which has RS-232 properties, not available..
n BNC interface: it has the same function of the RJ-45 Ethernet interface. But these two interfaces can't be used simultaneously.
n X.25 interface: DB25-type connector used as an OAM interface, not available now.
2.1.3 Board Area
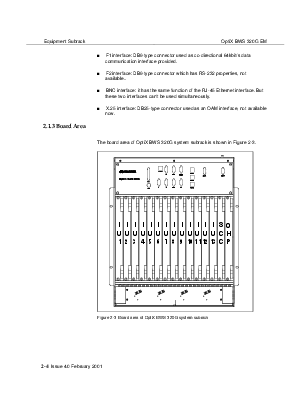
The board area of OptiX BWS 320G system subrack is shown in Figure 2-3.

Figure 2-3 Board area of OptiX BWS 320G system subrack
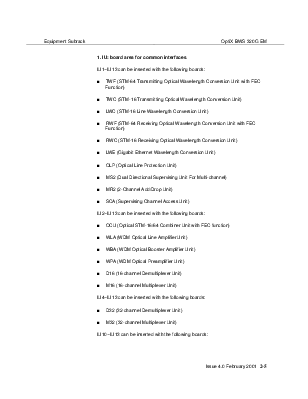
1. IU: board area for common interfaces
IU1~IU13 can be inserted with the following boards:
n TWF (STM-64 Transmitting Optical Wavelength Conversion Unit with FEC Function)
n TWC (STM-16 Transmitting Optical Wavelength Conversion Unit)
n LWC (STM-16 Line Wavelength Conversion Unit)
n RWF (STM-64 Receiving Optical Wavelength Conversion Unit with FEC Function)
n RWC (STM-16 Receiving Optical Wavelength Conversion Unit)
n LWE (Gigabit Ethernet Wavelength Conversion Unit)
n OLP (Optical Line Protection Unit)
n MS2 (Dual Directional Supervising Unit For Multi-channel)
n MR2 (2-Channel Add/Drop Unit)
n SCA (Supervising Channel Access Unit)
IU2~IU13 can be inserted with the following boards:
n OCU (Optical STM-16/64 Combiner Unit with FEC function)
n WLA (WDM Optical Line Amplifier Unit)
n WBA (WDM Optical Booster Amplifier Unit)
n WPA (WDM Optical Preamplifier Unit)
n D16 (16-channel Demultiplexer Unit)
n M16 (16-channel Multiplexer Unit)
IU4~IU13 can be inserted with the following boards:
n D32 (32-channel Demultiplexer Unit)
n M32 (32-channel Multiplexer Unit)
IU10~IU13 can be inserted with the following boards:
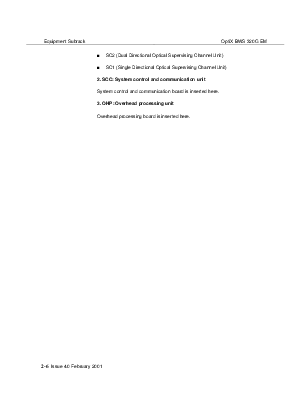
n SC2 (Dual Directional Optical Supervising Channel Unit)
n SC1 (Single Directional Optical Supervising Channel Unit)
2. SCC: System control and communication unit
System control and communication board is inserted here.
3. OHP: Overhead processing unit
Overhead processing board is inserted here.
2.2 Physical Parameters
2.2.1 Dimensions
615mm (height)×530mm (width)×284mm (depth).
2.2.2 Weight
37kg.
Equipment Subrack..................................................................................................................................................... 1
2.1 Subrack Structure........................................................................................................................................... 1
2.1.1 Overall Structure of Subrack.................................................................................................................. 1
2.1.2 Interface Area....................................................................................................................................... 3
2.1.3 Board Area.......................................................................................................................................... 4
2.2 Physical Parameters........................................................................................................................................ 7
2.2.1 Dimensions.......................................................................................................................................... 7
2.2.2 Weight................................................................................................................................................. 7
Уважаемый посетитель!
Чтобы распечатать файл, скачайте его (в формате Word).
Ссылка на скачивание - внизу страницы.