Gouraud shading - Заливка Гуро
|
|
figure 1 - рисунок 1
Gouraud shading can be done in two ways, as with polygon fillers. They can either reflect the z distance to the eye, or they can reflect the color they are given by a light source. But to understand them both we need to make the first example, the z-color gouraud.
Заливка Гуро может быть выполнена двумя способами при заливке многоугольника. Многоугольники могут или отражать z расстояние от глаза, или они могут отражать цвет, который им дан источником освещения. Но для того чтобы понимать их оба, мы должны сделать первый пример, z-цвет Гуро.
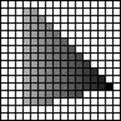
Now, the diffrence from flat to gouraud isnt that big at all. We need nearly the same scanedge routine, nearly the same hline draw and nearly the same variables. For a start, lets look at some examples of gouraud. Please note, that on these pictures, the longer the point of the polygon is from you, the viewer, the darker it gets, and that is in fact what z-gouraud is about. But how can we make that with our old scan edge routine?
Теперь, различие плоского от Гуро не большое вообще-то. Мы нуждаемся почти в той же самой scanedge подпрограмме, почти той же самой hline и почти тех же самых переменных. Для начала, давайте, рассматрим некоторые примеры Гуро. Пожалуйста, обратите внимание, что на этих изображениях, чем дальше точка многоугольника от Вас, наблюдателя, тем более темной она кажется, и это фактически и есть z-Гуро. Но как мы можем сделать это с нашей старой scanedge подпрограммой?
For a start we need a new variable called zpos. Zpos is of the same type as xpos, but it reflects the z position at the x position we are given by the xpos array. Lets make an example. If we have the polyogn from the above picture, we see that the point where our xpos gives us the xpos of the left/right polygon, we have a z color also. So, what help would that give us? Yes, correct, we change our hline routine to draw diffrent colors from xpos[y][0] to xpos[y][1]. This shouldn't be so hard at all, although we need to rewrite our routines, but very little, I can assure you.
Для начала мы нуждаемся в новой переменной, называемой zpos. Zpos имеет тот же самый тип как xpos, но это отражает позицию z в позиции x, которую мы берем из xpos массива. Давайте сделаем пример. Если мы имеем полигон из вышеупомянутого изображения, мы видим, что точка, где наш xpos дает нам xpos налево/справа многоугольника, мы имеет z цвет также. Но что такая помощь дала бы нам? Да, правильно, мы изменяем нашу hline подпрограмму, чтобы рисовать различные цвета от xpos [y] [0] до xpos [y] [1]. Это не должно быть настолько трудно вообще, хотя мы должны перезаписать наши подпрограммы, но очень немного, я могу гарантировать Вам.
For a start, lets take the scanedge routine. In this routine, we need to reflect the the zedge, and therefore we also need the z values of the two points we are drawing an edge from. Now, if we include those in our parameter string of our scanedge it would look like this:
Для начала, давайте возьмем scanedge подпрограмму. В этой подпрограмме, мы должны отразить zedge, и, следовательно, мы также нуждаемся в значениях z из двух точек, из которых мы рисуем край. Теперь, если мы включаем в нашу строку параметра нашего scanedge, это выглядело следующим образом: бы
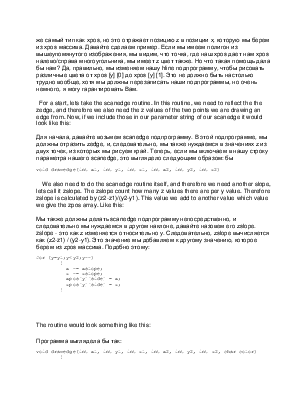
void drawedge(int x1, int y1, int z1, int x2, int y2, int z2)
We also need to do the scanedge routine itself, and therefore we need another slope, lets call it zslope. The zslope count how many z values there are per y value. Therefore zslope is calculated by (z2-z1)/(y2-y1). This value we add to another value which value we give the zpos array. Like this:
Уважаемый посетитель!
Чтобы распечатать файл, скачайте его (в формате Word).
Ссылка на скачивание - внизу страницы.