Installing new languages on different operating systems requires different steps. Each operating system is unique and in some cases such as Windows 9x, you may not be able to change the operating system to the language of choice. It is beyond the scope of this course to cover the steps for each operating system. In this course, however, we will review the steps necessary to install a language on Windows 2000.
Installing a language is a fairly simple process in Windows 2000. Available languages are found in Regional Options in the Control Panel. On the General Tab, you will see the option Language Settings For Your System. This option lists available languages and installs all necessary components to use that language at the operating system level.
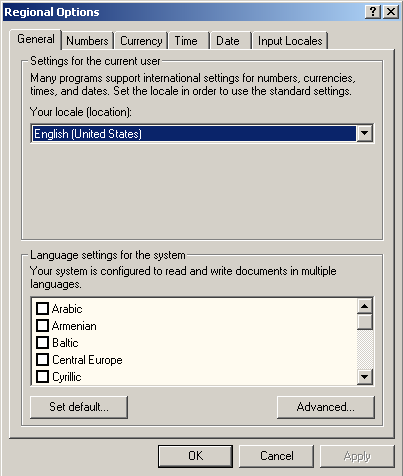
Figure 3 – Windows Regional Options
Note
Be aware that regional settings are different than language settings, even though regional settings are termed in languages. Regional settings set the way in which dates, numbers, currency and time are formatted. They are independent from language settings.
Once the language is installed, you will be able to use it immediately within Microsoft Project 2000. However, there are some considerations that you should take into account. First, not all languages are input only via a keyboard. For example, Japanese uses a tool called the Input Method Editor (IME). The IME is a floating toolbar that gives you additional options for inputting the pictographs (or Kanji) that the language uses.
Other languages use hot keys to switch between inputting from one language to another. The options for all of these different input methods are found on the Input Locales tab within Regional Options.
|
|
Try This: Install the Japanese Language on Your System Install Japanese at the OS Level |
1. In the Control Panel of Windows 2000, click Regional Options.
2. On the General tab in the “language Setting for the System” section, put a check by Japanese. Click OK and restart your system.
3. After rebooting, go back to Regional Options and click the Input Locales tab.
4. Click Add and choose Japanese for the Input Locale. Click OK twice.
You should see a small square in your system tray with the letters EN. This signifies that English is the language that you will enter in. If you click the square, you will be able to choose Microsoft IME 2000 (Japanese) for Japanese input.
There are five Multi-language packs available for Microsoft Project 2000. They are French, German, Italian, Spanish and Japanese.
The Microsoft Office Language Settings tool is used to make your language settings for your Microsoft Office 2000 applications. The tool allows you to change the following language properties.
This setting denotes which language you want menus and dialog boxes to be written in. The UI language setting only applies if the application can natively display the language you chosen or if a language pack is installed that matches your UI setting. For example, suppose you have an English system, you have installed English Microsoft Office 2000, and you have installed the German language pack. Also, you have set the UI language option to German. If you install an English version of Microsoft Project 2000 don’t install the German language pack, Microsoft Project 2000 will appear in English.
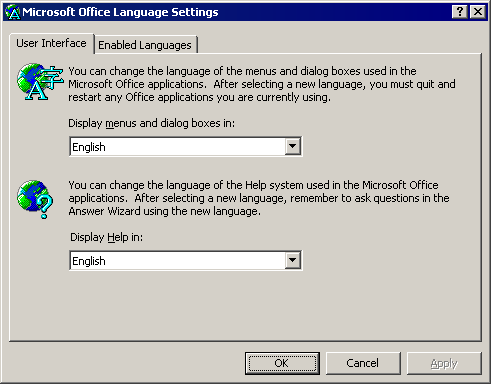 |
Figure 4 – User Interface and Help Menu Language Settings
This setting allows you to use proofing tools and localized formatting (that is, for dates, time, etc.) within Microsoft Project 2000.
This setting denotes the original language version of Microsoft Office or Microsoft Project that was installed
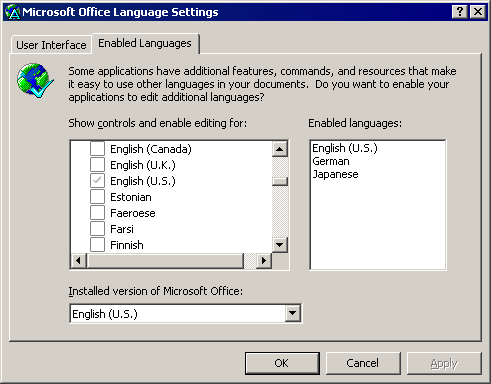 |
Figure 5 – Enabled Languages
Уважаемый посетитель!
Чтобы распечатать файл, скачайте его (в формате Word).
Ссылка на скачивание - внизу страницы.