4. When you do not rename SETUP.INI and keep it at the root where SETUP.EXE is located, you can run SETUP.EXE from this location without using any command line switch(es).
Method 2 – SETUP.INI:
Modify the SETUP.INI to include network paths during setup. To do this, perform the following steps:
1. Open SETUP.INI on your source with Microsoft Notepad.
2. Remove the semi-colon before [Options], or else this section is ignored.
3. Add the following line to the [Options] section: SourceList=\\server1\adminpath\Prjfolder;\\server2\adminpath2\prjfolder2
4. Save the SETUP.INI.
If the admin modified the SETUP.INI on the install share, then they run setup.
If the admin changed the name of SETUP.INI or saved it to a location other than the root where SETUP.EXE is located, then they need to start setup using the /settings switch:
<path>\setup.exe /settings <path>\<name of setup.ini>
|
|
Both Method 1 and Method 2 are best done before Microsoft Project 2000 has been installed on a user’s computers. |
Method 3 – Modifying the Registry:
To modify the source list in the Registry, perform the following steps:
1. Run Regedit (or Regedt32 depending on operating system.)
2. Go to the following Registry key:
|
|
Hkey_Current_User\Software\Microsoft\Installer\Products\{PackageCode} \SourceList\Net |
3. Add a name value and a valid path to the Data1.msi file
4. Close the Registry.
Although resiliency can fix many errors before the user detects them, sometimes there are issues best resolved by repairing a Microsoft Project 2000 installation. A new command called Detect and Repair that is found on the Help menu is the primary way of doing this. Detect and Repair performs the following actions:
n Reinstalls a file if it is missing or an older version is present.
n Reinstalls a file if it is missing or corrupt (the stored checksum does not match the computed value).
n Re-writes all required user registry entries.
n Re-writes all required local machine registry entries.
n Reinstalls all Windows Installer shortcuts for Microsoft Project 2000.
When you click Detect and Repair on the Help menu of Microsoft Project 2000, the following alert message displays. When Detect and Repair runs, all files, registry entries, and shortcuts of Microsoft Project are verified and repaired.
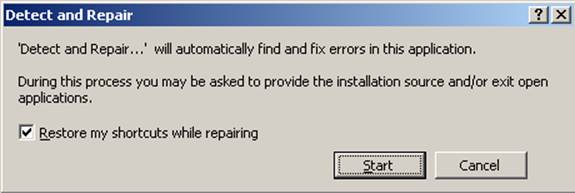
Figure 1 Detect and Repair
Repair does not touch user-customized settings such as the Global.mpt file. Microsoft Project 2000 regards customizations as intentional.
|
|
Use the Profile Wizard from the Microsoft Project 2000 Resource Kit to reset all user-customized settings to default. |
Detect and Repair on the Help menu only replaces damaged EXE and DLL files. These are files that have a version when you check the properties of the file from Windows Explorer. When you need to repair a non-EXE or non-DLL file, run Reinstall from Maintenance Mode.
When you click Reinstall on the Maintenance Mode Setup dialog box and then choose to Repair Errors, it performs the same actions as Detect and Repair on the Help menu. The Reinstall option is different in that it copies down a file even when the files are of equal version. Detect and Repair does not copy over the file when the installed file has the correct version and correct checksum.
|
|
Neither Reinstall from the Maintenance Mode Setup dialog box nor Detect and Repair on the Help menu can repair damaged projects. |
You can also run Detect and Repair from the command line using the following string:
<drive>:\setup.exe /focums data1.msi
The /f<options> command-line switch repairs a Microsoft Project installation and is documented in the Setupref.xls file in the Microsoft Project Resource Kit.
Уважаемый посетитель!
Чтобы распечатать файл, скачайте его (в формате Word).
Ссылка на скачивание - внизу страницы.