n The new labels are shaped like strip banners, so they should be affixed tidily in proper positions and directions. Otherwise, the product will appear unpleasing to eyes.
n Identification plates for power cables should be bundled with cable ties at the same height, and should face the same direction.
n The positions of “up”, “down”, “right” or “left” (excluding those described in section “Requirements on the printer”) are all based on the viewpoint of the engineering personnel who is working on the label.
D.3 Filling of Labels
Label contents can be printed with a printer or handwritten with an oiliness marker. For purpose of high efficiency and eye-pleasant layout, a printer is recommended.
D.3.1 Printing Labels
1. Template for the Printing
To print labels, a template is necessary. The template is available at:
n http://support.huawei.com/default.asp under the directory of Technical Documents ® Fundamental Documents ® Guide to Engineers ® Project Installation.
n Huawei local office
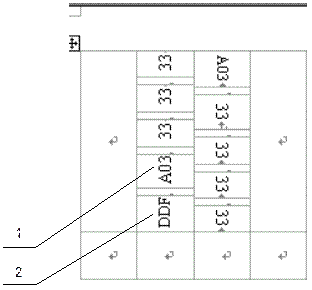
Figure D-4 shows the template.
|
(1) Cell |
(2) Cell |
Figure D-4 Template of label
2. How to Use the Template
The template is written in Microsoft Word. When using the template, you should observe the following items.
Through Microsoft Word, you can directly modify the contents on the template according to the positions where cables will be installed on the site. However, 1) the settings of centered characters, direction, and fonts should not be changed; 2) Generally, the character size does not need to be changed; and 3) When there are too many characters to be filled in, zoom out the characters, but make sure the printouts are clear and legible.
To merge the cells, do as follows:
Step 1 Start your PC, open the template through Microsoft Word, and recover the table structure (if gridlines are displayed, just ignore this step).
Step 2 Select the menu item [Edit/Select All].
Step 3 Select the menu item [Format/Borders and Shading/Borders]. Select Box and click <OK>.
Step 4 Drag the mouse to select the cells to be merged and select the menu item [Table/Merge Cells].
If two merged cells are still not enough to accommodate the characters, use multiple lines.
3. Requirements on the Printer
To print the labels, a laser printer must be used, but there is no restriction on the model of the printer. Before printing the label, set up the page and try the printing on ordinary blank paper (both sides are blank):
Step 1 Cover the blank paper onto the whole page of label paper, and check whether the page setup conforms to the requirement.
Step 2 Make sure the printer properties, such as "paper size" and “direction”, have been set correctly.
Step 3 If the warning prompt as shown in Figure D-5 appears before printing, click <Yes> to continue the printing.

Figure D-5 Warning prompt before printing
If the printout conforms to the requirement, print it to label paper. Otherwise, adjust the page setup and try the printing again, until the correct printout is produced.
The method of adjusting the page setup is as follows:
Step 1 Select the menu item [File/Page Setup].
Step 2 Select the Margins tab page.
Step 3 Select Left for Gutter Position.
Step 4 Set Header and Footer as 0, and adjust the values of Top, Bottom, Left, and Right.
After the page setup has been made correct, save it for future use. This page setup is only necessary at the first time you use the template to print the labels.
4. Checking the Printed Label
n All the printouts must be on the label, and nothing should be printed on the bottom page of the label.
n Contents in the cells should be aligned in the center. In a single-line printout, the dividing lines and the mark “TO” should not be covered by the printed characters.
Уважаемый посетитель!
Чтобы распечатать файл, скачайте его (в формате Word).
Ссылка на скачивание - внизу страницы.