Levels allow you to put different objects on different levels, which can de displayed or hidden to manage complex models. There are 1000 Levels in PowerSHAPE so it is a good idea to give them useful names. Levels 998 and 999 are reserved for Admin. It is good practise to generate a levels standard so no matter whose job you pick up within the company you will still be able to easily find the required data.
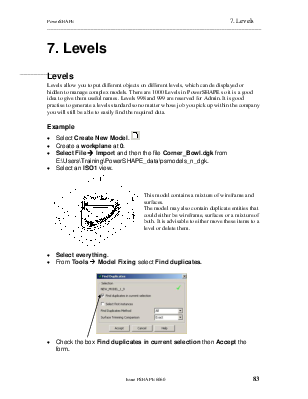
· Select Create New Model. ![]()
· Create a workplane at 0.
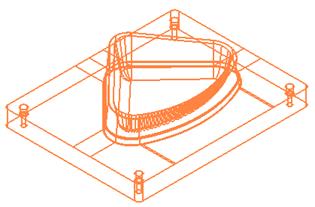
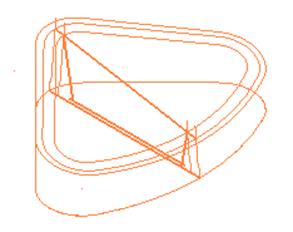
· Select File è Import and then the file Corner_Bowl.dgk from E:\Users\Training\PowerSHAPE_data\psmodels_n_dgk.
· Select an ISO1 view.
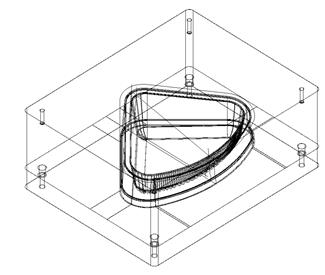
This model contains a mixture of wireframe and surfaces.
The model may also contain duplicate entities that could either be wireframe, surfaces or a mixture of both. It is advisable to either move these items to a level or delete them.
· Select everything.
· From Tools è Model Fixing select Find duplicates.
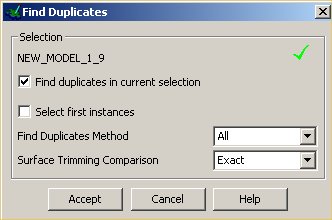
 |
· Check the box Find duplicates in current selection then Accept the form.
PowerSHAPE has only selected any duplicates it has found. These can be wireframe, surfaces or solids. To see what has been selected, the information icon can be used.
![]()
· Select Selection information.
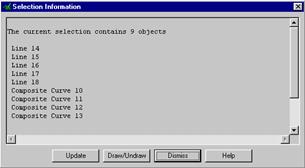
A list of the current selected items are shown.
These duplicates will be moved to another level.
· Select Dismiss.
· ![]() From the left side of the window, select the Levels button.
From the left side of the window, select the Levels button.
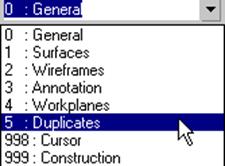
· In Level 5, enter the name Duplicates and press the big X by the number 5.
![]()
· Select Dismiss.
· Select all the wireframe and middle mouse click over the new level5.
The middle mouse will move the selected items to that level.
· Left mouse Click on level 5 button.
The left mouse will switch the level on or off. The duplicates disappear from the screen as the level is switched off.
 When an
item is generated, the default level that it is generated on is level 0, called
the general level. If, for example you wanted to always create surfaces on
another level then, once the option is selected, the level is picked from the
top pull down menu.
When an
item is generated, the default level that it is generated on is level 0, called
the general level. If, for example you wanted to always create surfaces on
another level then, once the option is selected, the level is picked from the
top pull down menu.
By choosing a level it will make it active. Be careful when doing this that nothing is selected otherwise the item will be moved to that level.
· Open the Levels form and create two further levels, 6 as Core and 7 as Cavity.
· Dismiss the form.
This model contain solids. These are a different type of component with PowerSHAPE, which can be used to make complex shapes. A solid can be selected by clicking on any part of it.
· Select the bottom solid and press Ctrl + K (Blank Except)
The bottom solid can be seen clearly by blanking everything apart from the selected item/s.
· Click the middle mouse button over level 6.
· Select Ctrl + L (unblank)
· Select the top solid and press Ctrl + K (Blank Except)

The top solid is shown.
· Click the middle mouse button over level 7 and Select Ctrl + L.
The component solid and construction wireframe remain on level 0 (General).
PowerSHAPE has the ability to allow Grouping of levels. By grouping items together the user can manage parts of the model more efficiently and effectively.
· ![]() From the left side of the window, select the Levels button.
From the left side of the window, select the Levels button.
· In Level 8, enter the name Components: Wireframe and press the big X by the number 8.
· In Level 9, enter the name Components: Solid and press the big X by the number 8.
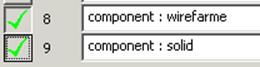 The
word Component represents the Group name and the word Wireframe
or Solid the level name.
The
word Component represents the Group name and the word Wireframe
or Solid the level name.
· Select Dismiss.
![]()

The two levels now belong to the group called Component.
On the Levels toolbar, the following changes can be seen:
· A new button appears representing the group of levels.
· The buttons of the two levels have changed to the same colour (Blue).

· The colour of the group button matches that of the two levels.
Levels can be turned on and off using the group button. If you right-click on a button on the level toolbar, a pop up menu is displayed. This menu is used to turn on a single button using the Solo option or blank and unblank objects. In the case of a group button, when you select Solo, all the levels in that group are turned on. If further Groups are created then a new colour will be assigned to that Group making it easily distinguishable from others.
· ![]() From the Select
From the Select ![]() menu, select Quick select all
wireframes.
menu, select Quick select all
wireframes.
· Press Ctrl + K (Blank Except).
The wireframe is selected.
· Click the middle mouse button over level 8 and Select Ctrl + L.
· Select the component solid and place it onto level 9.
It is important to remember that whatever level is displayed in the Levels pull down menu at the top of the screen, any further wireframe or surface creation added will be assigned to that level.
· From the Levels pull down menu select 0 : General Level.
In some instances it is advisable to make safe copies of surface or wireframe entities to save time having to recreate them later on if required. For this exercise we will copy the core solid and paste it onto the General level 0.
· Turn on Level 6 and select the solid.
![]()
![]()
· From the top menu, select Copy and then Paste.
It may appear as though nothing has actually happened, but the surfaces that are displayed yellow are the new copies of the original. Care needs to be taken that multiple copies are not created accidentally when using the Copy/Paste functions.
· Switch off level 6.
· Toggle on and off Level 0 to see the new copy.
· Select File è Close and select Yes to losing Changes.
Using the pump example we can put the blanked wireframe onto a named level.
· Open the model pump-project2.
· Name level 5 as geometry.
· ![]() From the Select
From the Select ![]() menu, select Quick select all
wireframes.
menu, select Quick select all
wireframes.
· Press Ctrl + K (Blank Except).
· Move the selected wireframe to level 5 and switch the level off.
· Select File è Save and then File è Close.
Уважаемый посетитель!
Чтобы распечатать файл, скачайте его (в формате Word).
Ссылка на скачивание - внизу страницы.