· ![]() Select the Arc Menu.
Select the Arc Menu. ![]()
· Select the Three points option.
· Move the cursor over the outer left circle until the word Tangent appears and press the Left mouse button.
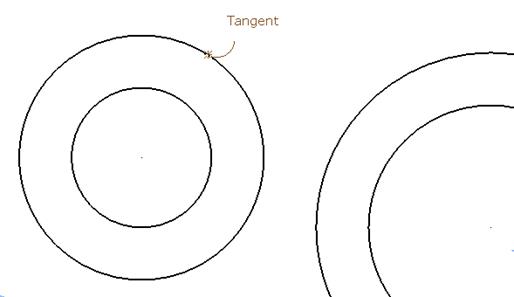
· Move the cursor over the middle outer circle so the word Tangent appears and press the left mouse button.
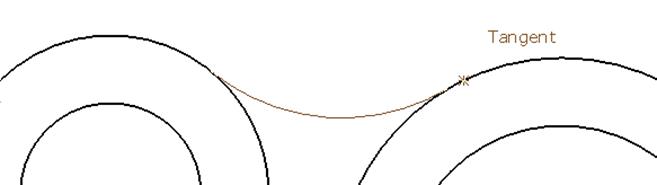
· Move the cursor over up and down to get the tangent arc in the correct place and press the Left mouse button.
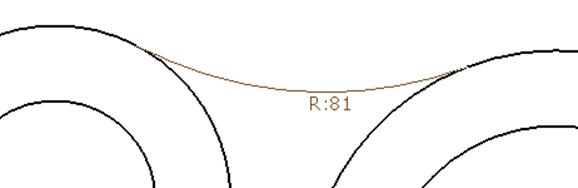
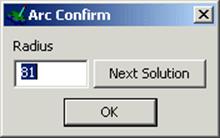
The Arc Confirm form appears. This can be used to enter an exact radius.
· Enter a value of 75 and press OK .
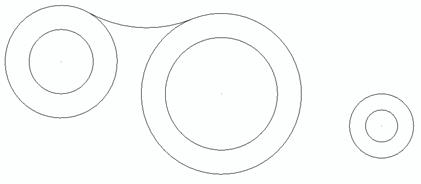
The tangent arc is drawn.
· ![]() Select the Arc Menu.
Select the Arc Menu. ![]()
· Select the Three points option.
· Move the cursor over the middle outer circle until the word Tangent appears and press the Left mouse button.
· Move the cursor over the right outer circle so the word Tangent appears and press the left mouse button.
· Drag a radius of 225 and press OK.
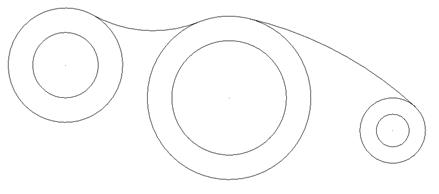
The second radius has been generated. The further two can be generated in the same manner
· Create a three point arc between the left outer circle and the middle outer circle with a radius of 225mm.
· Create a three point arc between the right outer circle and the middle outer circle with a radius of 75mm.
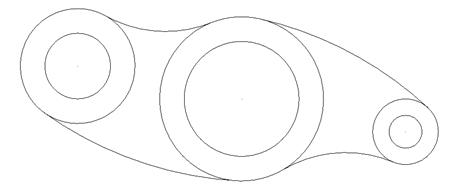
The model is complete. The option needs to be switched off and the wireframe copied to a new level.
· Select Tools è Options, select Object then Arcs.
· Tick Trim Tangent items. ![]()
· Press Accept.
· ![]() From the left side of the
window, select the Levels button.
From the left side of the
window, select the Levels button.
· In Level 6, enter the name Cam and press the big X by the number 6.
![]()
· Select Dismiss.
· Select all the wireframe and middle mouse click over the new level 6.
The middle mouse will move the selected items to that level.
· Left mouse Click on level 6 button.
· Select File è Save.
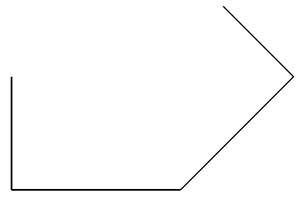
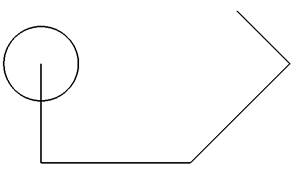
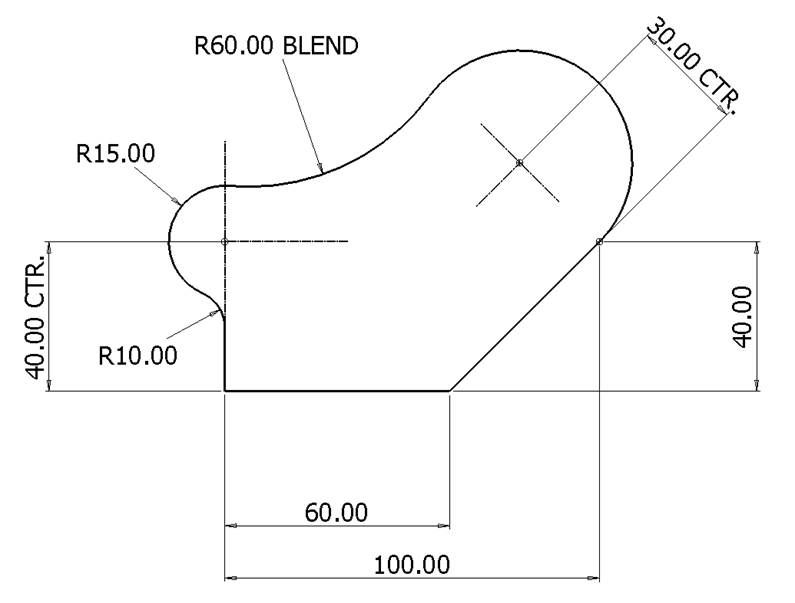 The following tutorial will show the basic operation of the
Wireframe Constructor by recreating the 2D profile shown in the above drawing.
The following tutorial will show the basic operation of the
Wireframe Constructor by recreating the 2D profile shown in the above drawing.
· Select the Line menu. ![]()
· From the down arrow, select Single Lines option.
 |

· Enter the start co-ordinate of 0 (for X0 Y0 Z0) and press Return.
![]()
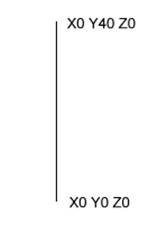
· Input the values 0 40 (for X 0 Y 40 from the previous point) in the Command input box and press Return.
· ![]() Select the Line menu.
Select the Line menu. ![]()
· From the down arrow, select Continuous Lines option.
· Move the mouse over the start point of the existing line (xyz 0) and click the left mouse button when End appears.
· Input the value 60 in the Command input box followed by Return.
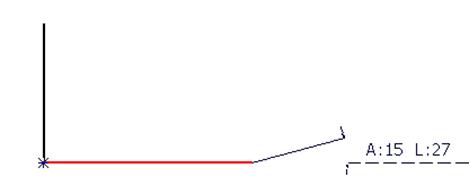
The horizontal line is drawn and the cursor is ready to make another line as continuous line mode was selected.
· Input the value 40 40 in the Command input box followed by Return.
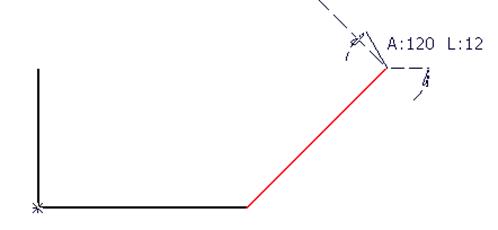
The angled line has been generated. The next line is used for construction purposes only and will be deleted.
· Input the value –25 25 in the Command input box followed by Return.
· ![]() Press Select.
Press Select.
 |
To provide the correct position for the arc centre the last line needs to be modified to the correct length.
· Move the cursor over the line and with the left mouse button double-click to open the Line Editor form
·  Modify the length to 30 and press Accept.
Note the above form provides a comprehensive range of options to modify the line. If any PowerSHAPE entity is quickly double clicked with the left mouse key the relevant editor will appear either as a Form or a Toolbar.
Arcs need to be generated to complete the wireframe.
· Select the Arc Menu. ![]()
· ![]() Select the Full Arc option.
Select the Full Arc option. ![]()
· Input the value r 15 in the Command input box and press Return (This will temporarily change the default radius (20).
· Move the cursor over the open end of the vertical line until the text End is displayed then click the left mouse key to snap the circle centre position.
· ![]() Press Select.
Press Select.
Уважаемый посетитель!
Чтобы распечатать файл, скачайте его (в формате Word).
Ссылка на скачивание - внизу страницы.